


After Effects is feature-packed to allow you to create literally anything you can imagine in your video projects. Unfortunately, it also produces gargantuan video file sizes that are nearly impossible to share.
Thankfully, that’s where our favorite compressed video file format comes in. MP4 is a popular video format option because of its universal compatibility, especially on smartphones. If you want to share your sweet video effects to Instagram or TikTok, MP4 is your best bet.
Pros and Cons of the MP4 format
As with anything in life, the MP4 video format has a lot of pros and cons. Choosing to use the MP4 format comes down to how you plan on using and sharing your video files.
The benefits of MP4:
- It’s one of the most universal file formats.
- It has a high amount of compression, which provides a smaller file size.
- It allows you to attach multiple kinds of files in the package, including metadata.
If you’re looking for a file format that allows you to share on any computer or mobile device with ease, and you don’t plan on reproducing it over and over, MP4 is the perfect format for you.
The drawbacks of MP4:
- It’s a “lossy” compression format, meaning file information is lost during each compression. This limits the amount of times you can re-compress the file until it is no longer recognizable.
- It is an easy format to illegally reproduce and distribute.
- It can use a lot of computing power to play MP4 files.
If you’re planning on making copy after copy of your file, or you’re producing content that you want to ensure stays secure and not vulnerable to piracy, MP4 may not be the best format for you. However, for the average video producer, these drawbacks will likely not matter much to you.
If you’re here, you’re likely a video producer that is ready to share your latest creation with every screen you can get it on, which means that you’re looking to take advantage of the universal compatibility and small file size that MP4 provides.
So, how do you take your massive After Effects projects and convert them into the much smaller MP4 format? Thankfully Adobe typically bundles their Media Encoder platform with After Effects subscriptions, making compressing After Effects projects easy.
However, if you don’t have Media Encoder or just prefer to have an alternative, there are still ways to compress your After Effects projects.
We’ve got your ultimate guide to exporting your After Effects projects to MP4, with or without Media Encoder.
How to export projects in After Effects to MP4 (Using Media Encoder)
Media Encoder is Adobe’s native file compression software and pairs perfectly with all its creative tools. It allows you to export and compress files into nearly any format so you can share them easily.
Here’s how to export projects from After Effects to mp4 using Media Encoder:
Step 1: Open the After Effects project you want to export
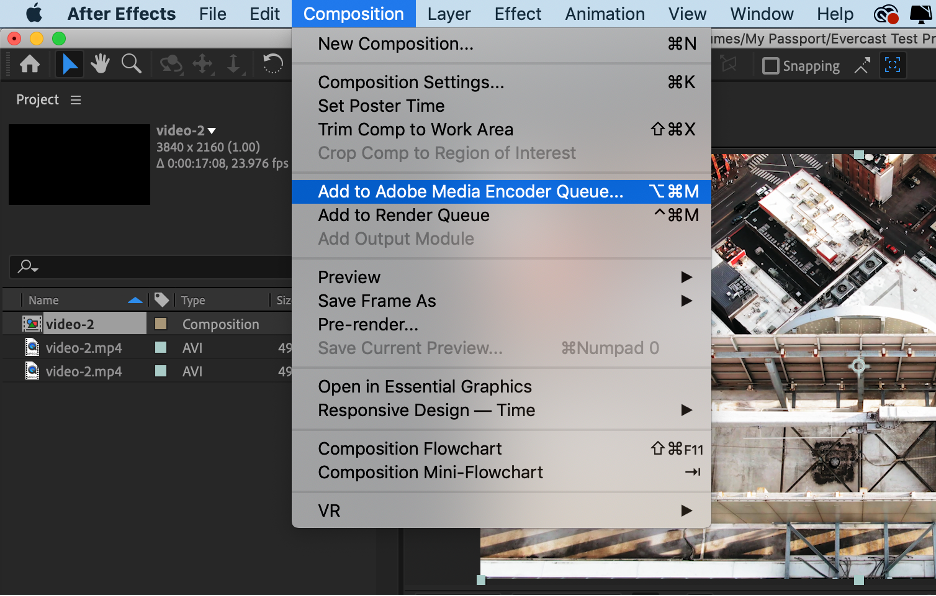
Step 2: Select “Composition” and then choose “Add to Adobe Media Encoder Queue.”
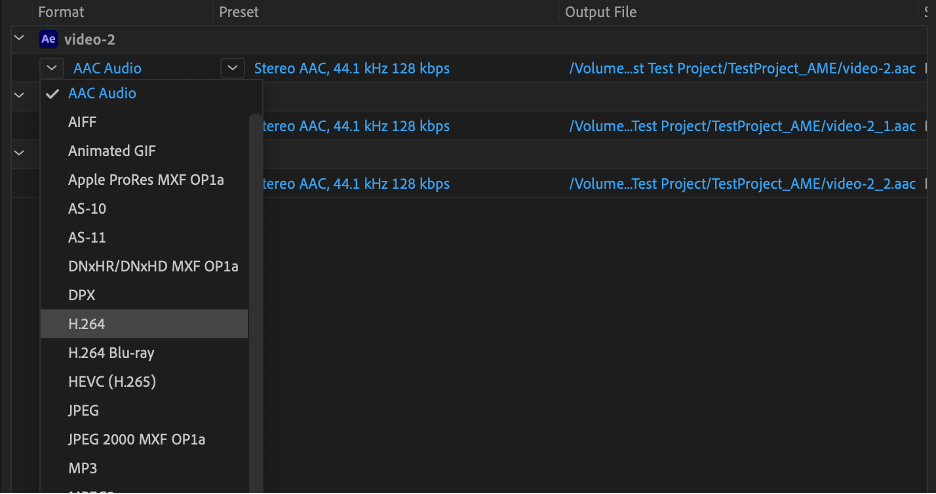
Step 3: In Media Encoder, locate “Format” and select “H264”
Media Encoder should open automatically. However, if it doesn’t, go ahead and open Media Encoder and your queued compositions should appear in the queue.
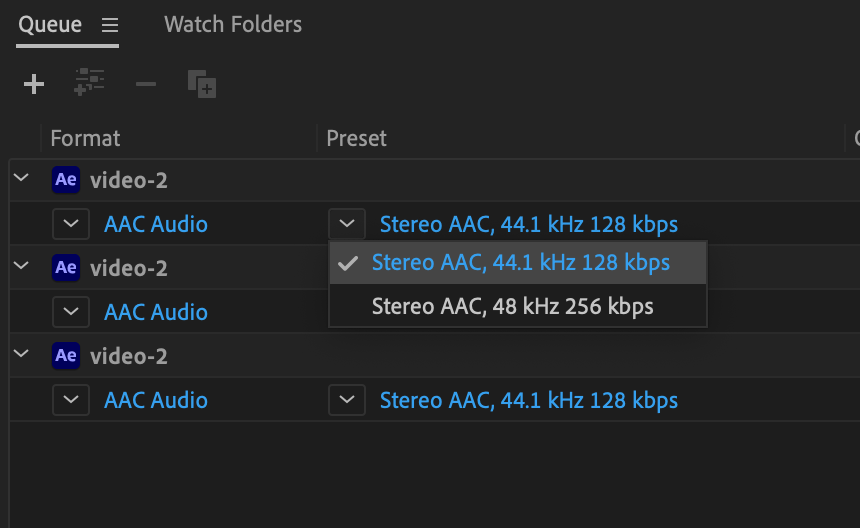
Step 4 (Optional): If you would like to apply a preset, select “Preset” and choose which preset you would like to use.
Create together remotely, in real time
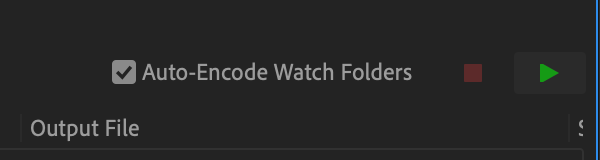
Step 5: Once you’re ready to compress, select the green “Play” icon to start your export.
That’s it! Now your files will export as mp4 files, giving you a smaller, more manageable file size than the massive project files that After Effects produces.
Now, if for whatever reason you don’t have Media Encoder, you can still export mp4’s from After Effects.
How to export After Effects project to MP4 (without Media Encoder)
Step 1: Open the After Effects project you want to export
Step 2: Select “Composition”, then “Add to Render Queue”

Step 3: In the Render queue, select the destination for your rendered file in the “Output To” option, then choose “Render” at the far right.
By default, After Effects will choose to export your file as an .mov file. This is a “lossless” format that doesn’t result in any file information loss during the render. You’ll want to ensure you’re rendering into a lossless format before converting to MP4 to preserve as much file information as possible before compression.

You will now get a .mov file that you still need to convert to an mp4 file.
Step 4: Download the program Handbrake.
Handbrake is an open-source media encoder that you will use to convert your .mov file to an mp4. It is available for both Mac and PC and provides a great free alternative to Media Encoder.
Step 5: In Handbrake, open your exported .mov (Quicktime) file.
Step 6: Make sure the format is set to “MP4 File”, select a destination for the exported file, then click the green “Start” button to export your MP4 file.

Now, you have a compressed mp4 file that you can play and share!
Related Reading: See our guide on the top 35 After Effects shortcuts to master for faster editing.
Speaking of sharing, if you want to collaborate on your edits with team members across the street or across the globe, Evercast allows you to stream your edit sessions in crystal-clear HD video while you video chat. When teams work together, they work better, and Evercast is on a mission to give creatives the tools they need to collaborate their way to success.


.avif)


.avif)


.avif)