


When you're editing in Premiere Pro, you may want to focus on certain elements that the original director of photography or videographer didn't fully highlight, or you may want to crop out unnecessary distractions at the edges of your frame.
Whatever the reason, Adobe Premiere Pro makes it easy to crop, rotate, and resize images, so you have the perfect frame. We've compiled this handy guide to help you get the hang of how to crop and resize images in Premiere Pro.
How to Crop a Video in Premiere
Cropping video in Premiere Pro is easy. Just follow these simple steps:
Step 1: Drag the video you want to crop to your timeline.
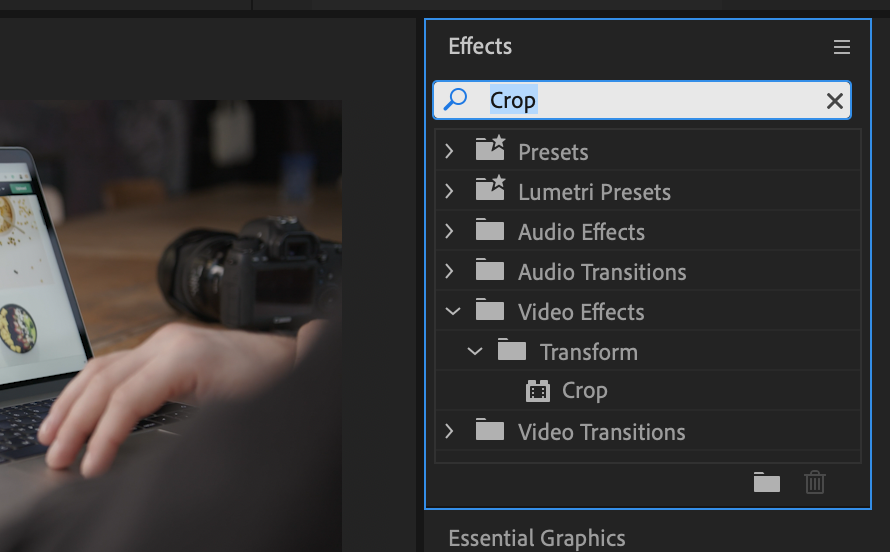
Step 2: Open the video effects panel under the “Effects” workspace

Step 3: Locate the Effects menu and search for “Crop”
If you want to manually locate it, the crop effect should be located under the “Transform” folder.
Step 4: Go to your Effects control panel.
Step 5: Locate the "Crop" dropdown and use the values next to the left, right, top and bottom to crop your clip to the desired size.
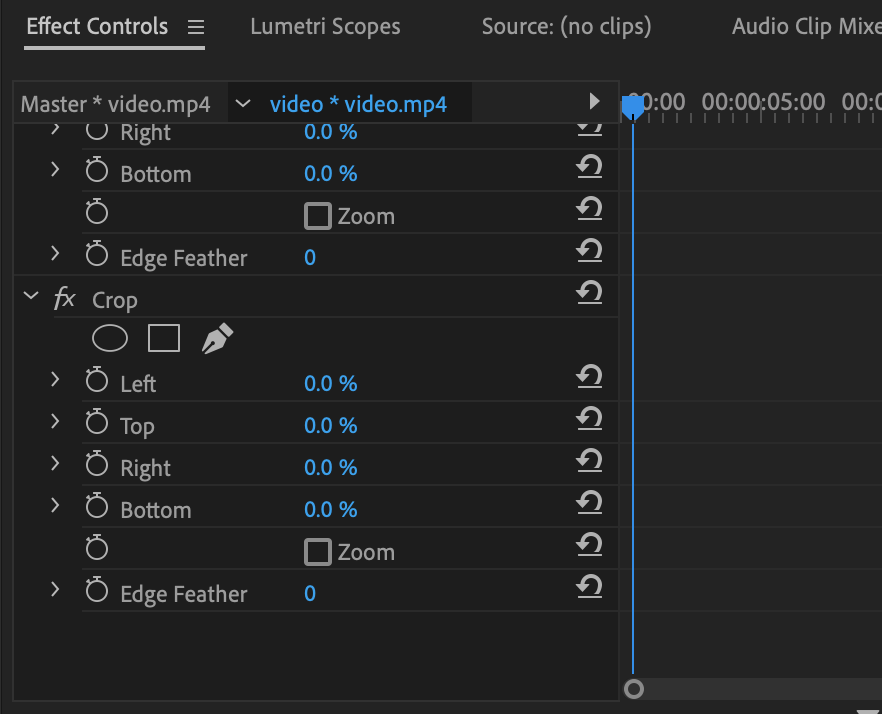
Step 6 (Optional): Zoom your cropped video in to fill the frame by clicking the “Zoom” checkbox
Create together remotely, in real time

And there you have it! You now have a cropped version of your original video clip.
Now, cropping is essentially cutting out any unwanted bits of the frame. However, you may just want to resize your frame instead of cropping it so you can either fill the frame better or retain the edges in case you want to make slight adjustments later
How to Resize a Video in Premiere
If you need to make a clip larger or smaller, you can also choose to resize the video. You can do this in several different ways.
Option 1: Set to Frame Size
This method allows you to resize a video to match the frame size of your sequence settings. This is ideally used when you’re importing video clips from several different sources and want each clip to be the same size even if they have different original sizes and resolutions.
- Locate the video on the timeline that you want to resize.
- Right-click the clip, and in the dropdown menu that appears, select "Set to Frame Size."
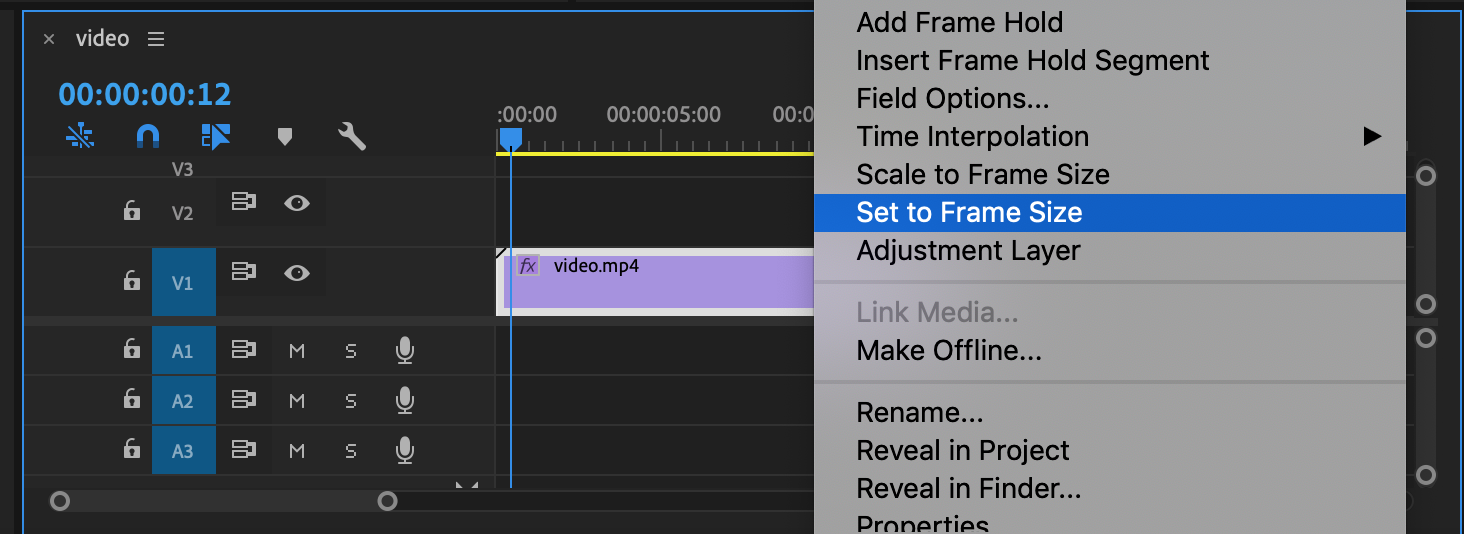
Your clip will now be the frame size defined by your sequence settings.
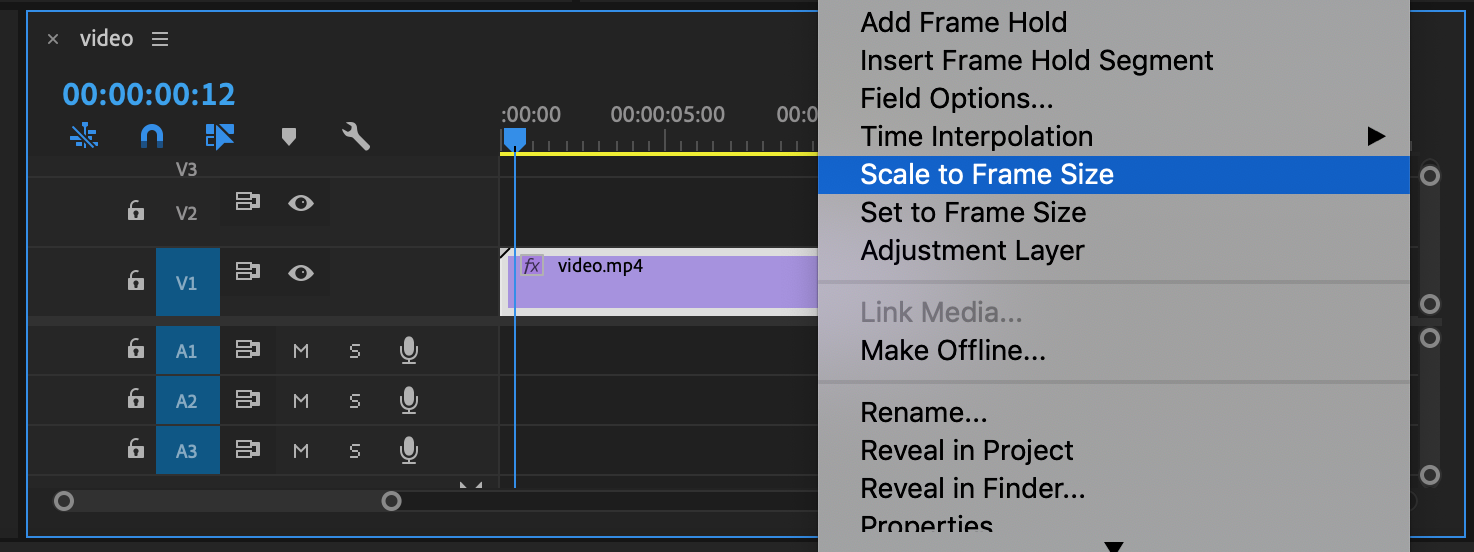
Option 2: Scale to Frame Size
While this option is similar to "Set to Frame Size," it's slightly different because it also manipulates the pixels within your image to adapt them to your sequence settings while saving you processing time. This can result in a loss of video quality; however, if you're crunched for time or processing power, this can be a good option.
- Select the clip on your timeline you want to resize
- Right-click the clip and select "Scale to Frame Size."
Option 3: Manual Scale
If you’re looking to manually resize your original clip instead of just setting it to your sequence settings size or scale, you can do that as well.
- Go to your Effects workspace.
- Find your Effects control panel and locate the "Motion" drop-down
- Find the “Scale” option under the Motion drop down and use the slider to scale the size of your clip inside the frame.

Simple Tips for Better Cropped Clips
Tip #1: If possible, crop clips with a higher resolution than your intended final resolution.
If you plan on exporting your project in 1080p, try to only crop clips that are at least 2k resolution or above. This will reduce the chances of image quality loss and result in a much more seamless final product.
Tip #2: Try to crop as symmetrically as possible and in the same aspect ratio as your final frame.
This will result in a better fit and no additional loss of the image when you resize to fit your sequence settings.
Tip #3: Only crop what’s necessary, don’t go overboard.
If you crop too much, you'll lose resolution, and your cropped images will appear blurrier and lower-quality than the rest of your footage. You can use certain plugins to try to counteract this, but a good rule of thumb is only crop if you have the extra megapixels to spare and only as needed.
Hopefully, this guide and these handy tips can help you crop and resize your videos like a pro!
If you’re looking for a better way to bring your remote editing team closer together and collaborate more efficiently from a distance, check out Evercast. Evercast allows you to stream your edit sessions in HD while video chatting and exchanging notes with your team, all under one platform. Because we believe collaboration is the magic behind the movies. Learn more about plans and pricing.


.avif)


.avif)


.avif)