


When you’re working on a long project, editing individual video and audio clips one by one can be a tiresome and tedious process. Plus, with individual audio and video clips, one wrong move and your entire project can shift out of sync, making your masterpiece look like a bad foreign-language dub.
Thankfully, Adobe Premiere Pro has built-in lots of features to help make your post-production woes a little less, well, woeful. By merging video and audio clips using a few simple tricks, you can speed up your media edits, keep your Timeline organized, clean up bad audio, and even create split-screen effects in a snap.
Welcome to your ultimate tutorial for merging video and audio clips in Adobe Premiere Pro.
How to Combine Video Clips in Adobe Premiere Pro
One of the best ways to merge video clips in Adobe Premiere Pro is a technique called nesting. Nesting allows you to combine a series of video clips into one short sequence, which can then be used as a single clip and "nested" back into your primary or "master" sequence.
The most significant advantage to merging clips through the nesting method is that you can still edit your merged clips individually by accessing the secondary "nested" sequence.
This non-destructive method is especially handy if you’re working on long projects or simply want to save time applying certain effects by applying them to groups of clips instead of individually.
Here’s how to create a nested sequence in Adobe Premiere Pro:
- Add the original clips you want to merge to your main Timeline.
- Select the clips.
- Right-click on the selected clips and choose “Nest…” from the drop-down menu that appears.
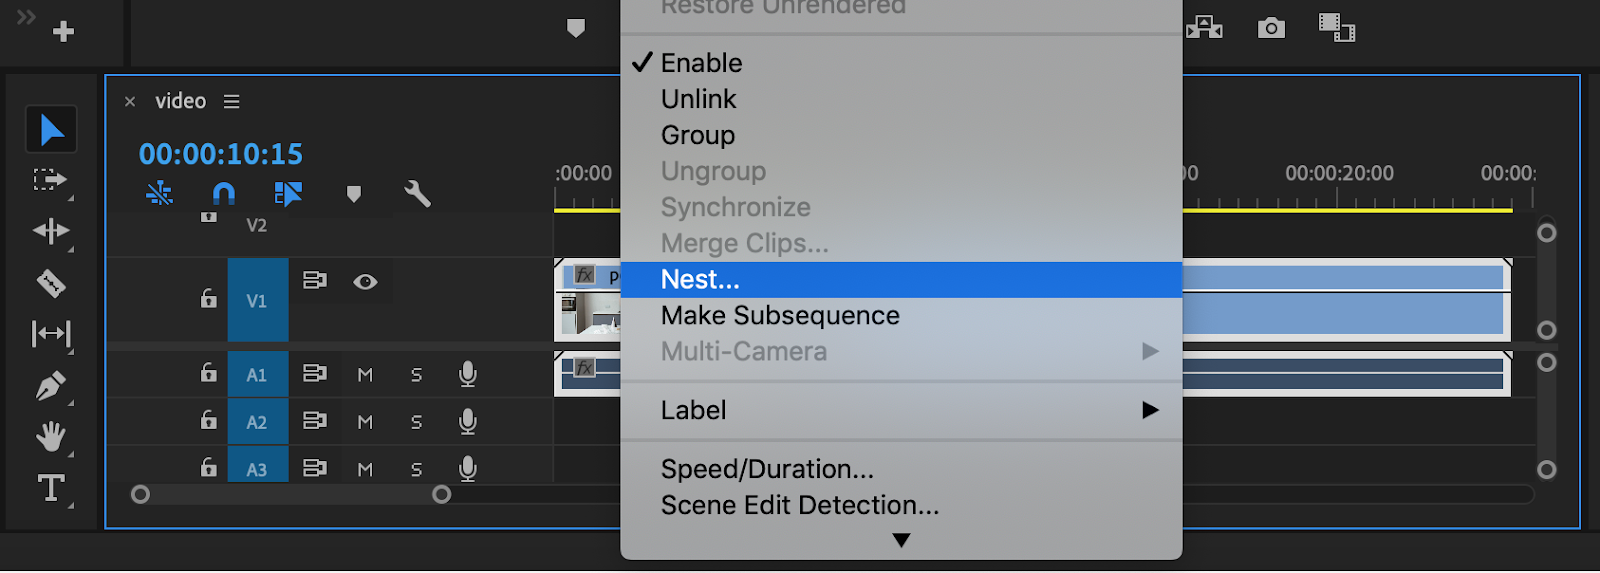
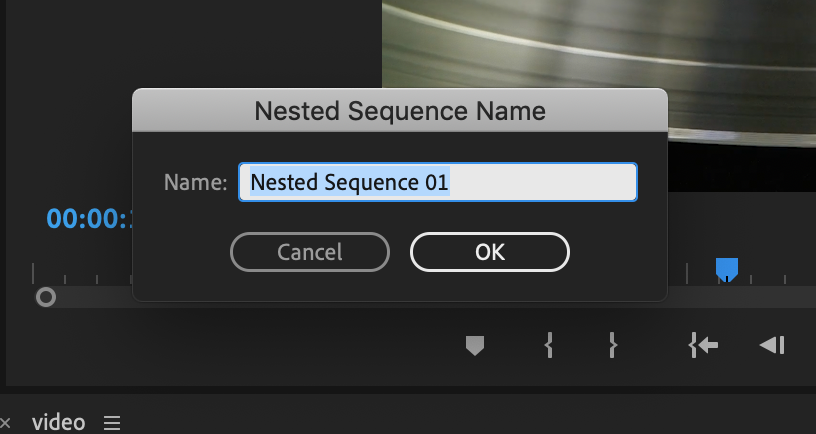
- When prompted, choose a name for your new sequence (for example: “BBQ Clips”) and hit “OK.”
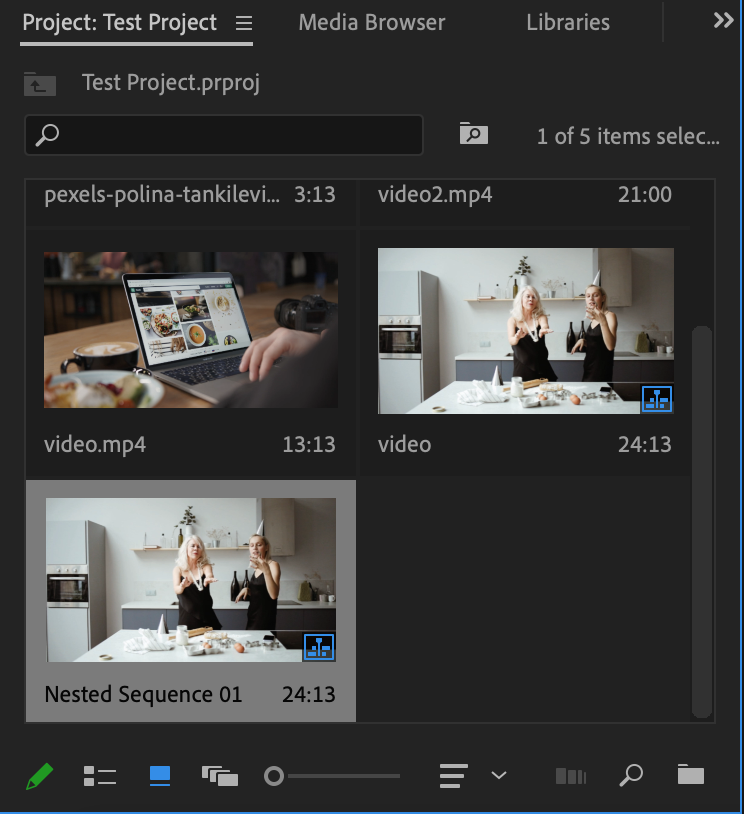
The new nested sequence will replace the individual clips in your main sequence and be edited as a single clip.

You can also edit your nested sequence by opening it one of two ways:
- Locate and double-click on the sequence in the Project panel (you can do this by locating the sequence name you chose, for example, “BBQ Clips”).
- Double-click on the nested sequence clip in your main sequence.
Once you’ve opened up your nested sequence, you can add or edit individual clips within the sequence. Any changes you make here will be merged together under the nested sequence on the main Timeline.
A key tip to keeping things organized: Make sure to name all of your sequences, including your main Timeline. We recommend your primary sequence be named “Main” or “Master” to distinguish it from your nested sequences.
How to Combine Audio Clips in Adobe Premiere Pro
You can also use the nesting technique to combine audio clips in Adobe Premiere Pro. Just like nesting videos, this technique preserves your original audio clips while combining them into a single, easy-to-manipulate clip on your main Timeline.
Here’s how to combine audio clips in Adobe Premiere Pro:
- Drag the clips you want to combine onto your main Timeline.
- Select all of the clips you want to combine.
- Right-click the selected clips and choose “Nest…” from the drop-down menu that appears.
- When prompted, name your new nested sequence, then click “OK.”
You can open your nested audio sequence just like you do a nested video sequence.
- Locate and double-click on the sequence in the Project panel.
- Double-click on the nested sequence clip in your main sequence.
Now, if you’d like to convert your nested sequence into a single audio track, follow these additional steps:
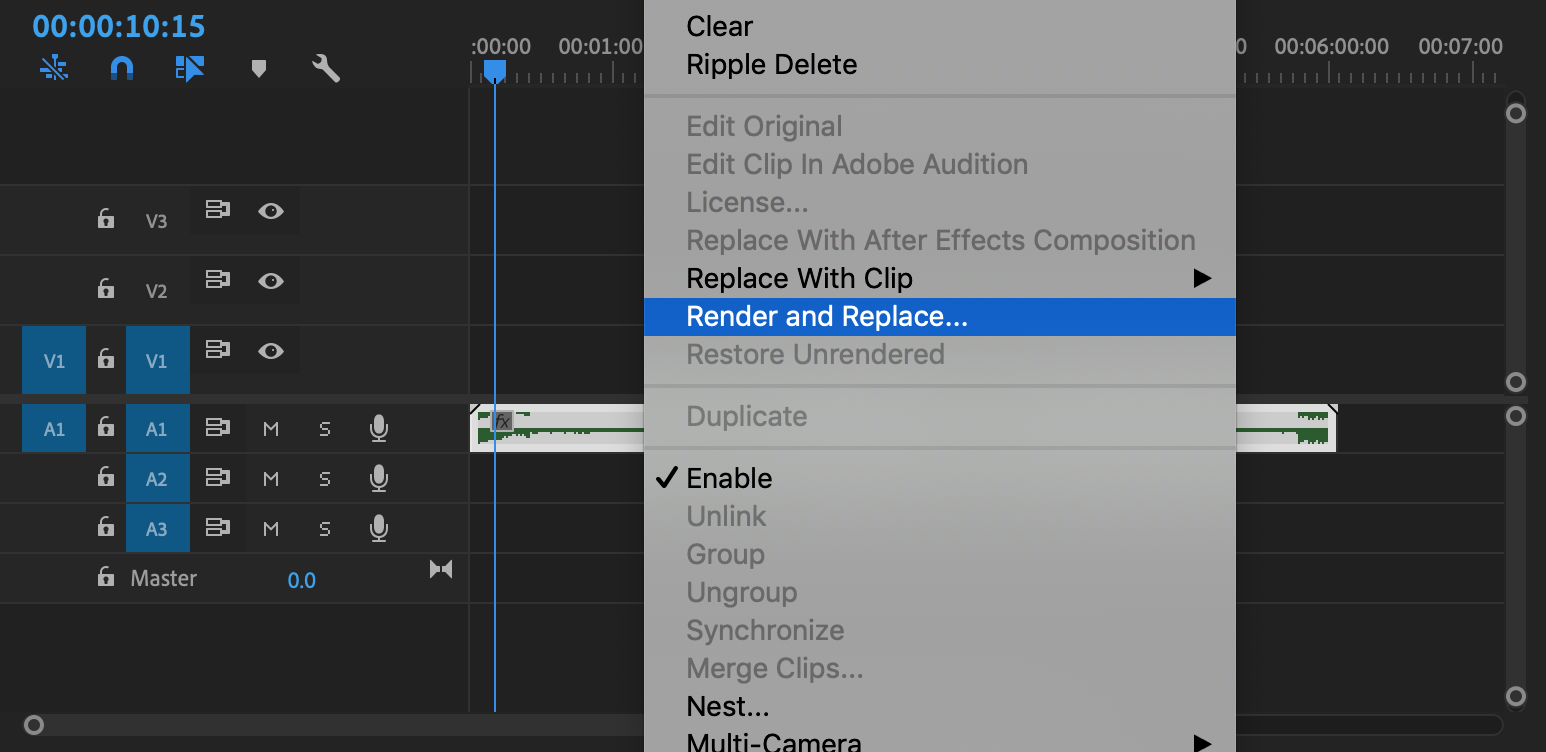
- Right-click the nested sequence on the Timeline.
- Select “Render and Replace” from the drop-down menu that appears.
Now your audio clips have been combined into one seamless audio track.
An important note on this step: If you choose to "render and replace" your nested audio sequence, you will no longer be able to edit the individual audio clips you've merged. They will all be replaced with a new single audio file. Many editors choose this step to save memory space during editing as it's less memory-intensive than nested sequences, but it is not a "non-destructive" form of editing.
How to Merge Audio Clips with Video Clips
Now that we’ve covered how to combine video and audio clips independently, what about syncing an audio clip with a video clip?
This technique is most used when multiple audio sources are used at the same time as a single video source. For example, you recorded an interview, and you used your camera's low-quality internal microphone as well as a higher-quality boom mic. You now want to merge the higher-quality audio with your video source. It can also be used to attach audio to a video-only clip or still image frame.
Here’s how to merge audio clips with video clips in Premiere Pro:
- Import both your audio and video files into the Project folder.
- Select the clips you want to merge.
- Right-click the selected files and choose “Merge Clips…” from the drop-down menu

- If you’d like, you can now rename your merged clips.

Create together remotely, in real time
You can also remove unwanted audio from your clip at this step in the process (for example, the lower-quality camera mic audio) and replace it with your merged audio.
Simply follow these additional steps:
- In the “Merge Clips” pop-up command, locate the “Synchronize Point” option and select “Audio.”
- Select the “Remove Audio from AV Clip” box.
- Click “OK.”
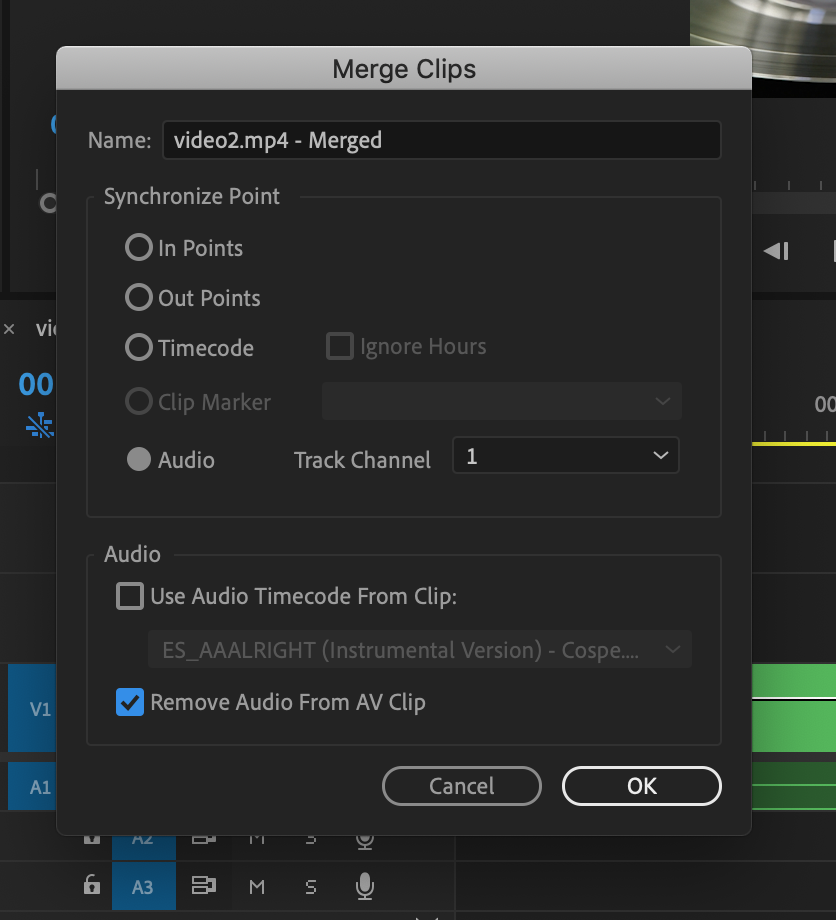
This process will sync your added audio with your original camera audio, then remove the camera audio. This leaves you with a merged audio-video file that only contains your preferred audio track.
You can now drag your clip to the Timeline and edit it like any standard video/audio clip.
How to combine multiple videos into one frame
Now, so far, we've covered combining video and audio clips in a linear fashion for the purposes of easier editing or improving audio quality. It's time to dig into a much more creative way of combining video clips: merging multiple clips into one frame.
This technique is often used to create "tiled" or "split-screen" effects. It has become very popular with the rise of "virtual ensembles" like orchestras or bands that record remotely and then combine their recorded videos into one single frame. It can also be helpful for multi-cam projects such as talk shows or podcasts to show more than one angle at a time.
Here's how to combine multiple clips into a single frame in Premiere Pro:
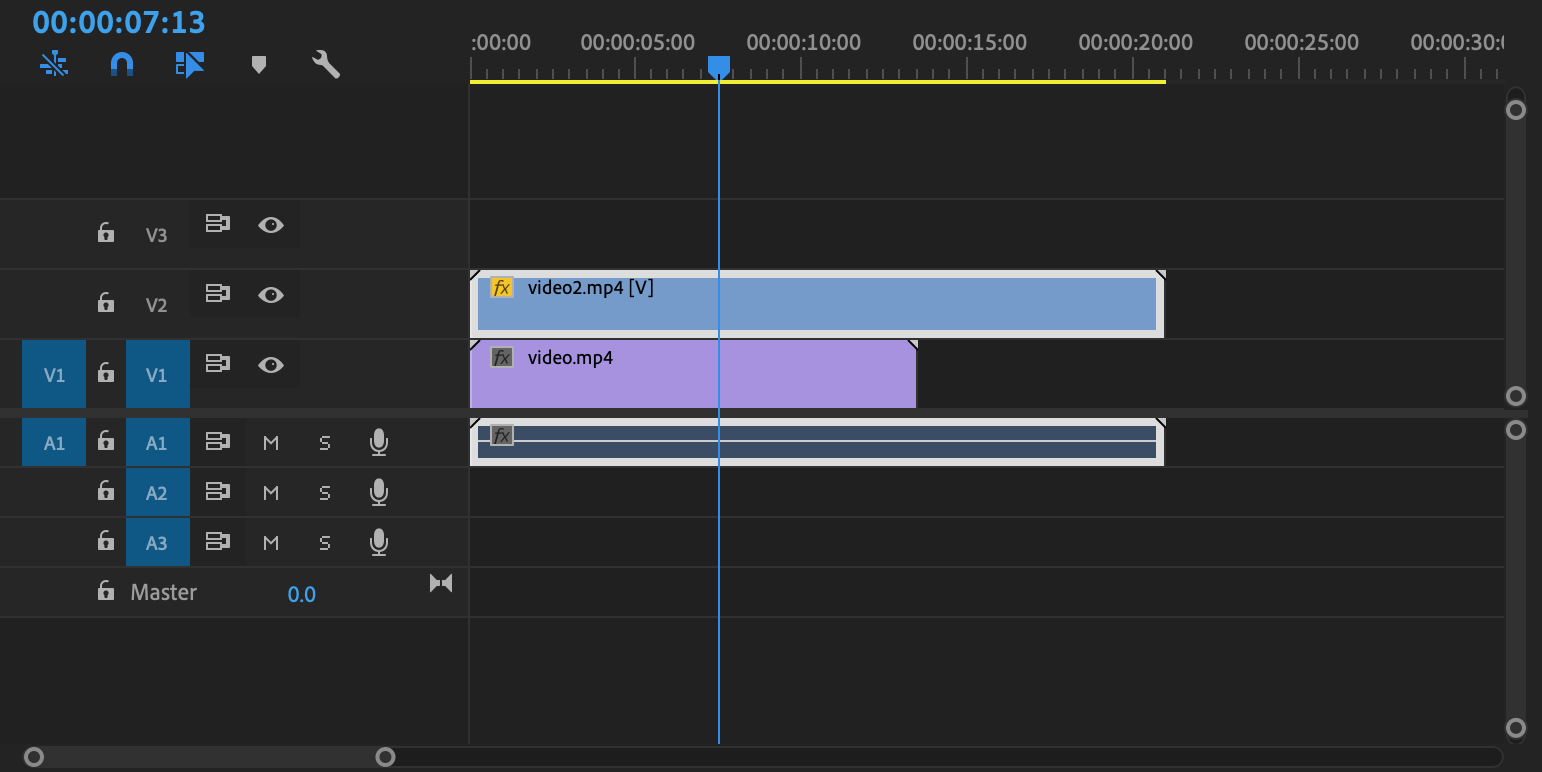
- Drag your clips to the Timeline, placing each clip on a separate track at the same edit point on the Timeline.
- Select one of the clips on the Timeline by double-clicking.
- Open your "Effect Controls" tab (usually located next to the "Source" window tab when editing in the default "Editing" workspace).
- Under “Video Effects,” locate the “Position” and “Scale” options.
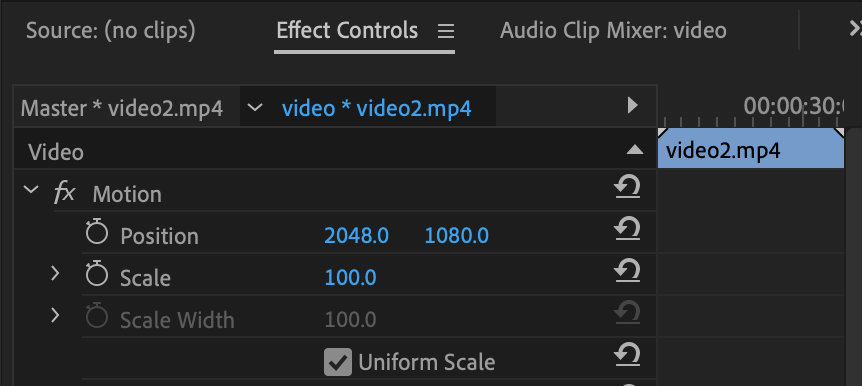
- Click on the values next to each of these options to manipulate your clip's size and location inside the frame using your mouse or arrow keys. You can also manually assign new values here if you like.
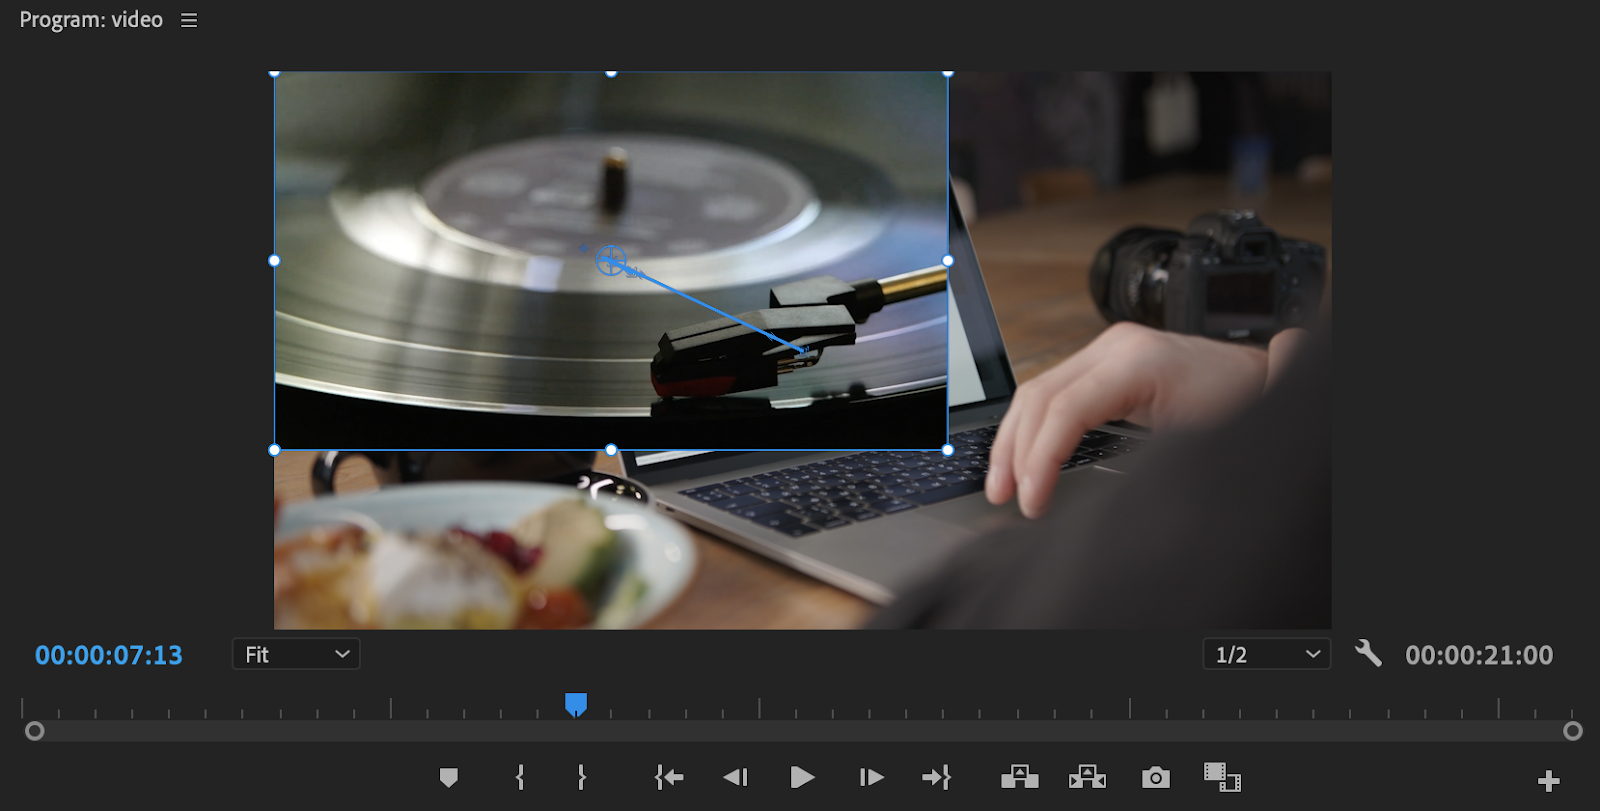
- Once you have your first clip in the position you want it, repeat these steps with your other clips until each clip is incorporated inside of your frame.
Now all of your video clips will play simultaneously within the same frame. You can experiment with different sizes and positioning for your clips, from comic book-style tiling to picture-in-picture framing.
Want to collaborate on your edits with team members across the street or the globe? Evercast allows you to stream your edit sessions in crystal-clear HD video while you video chat and even enables team members to make edit annotations all in one seamless platform. When teams work together, they work better, and Evercast is on a mission to give creatives the tools they need to collaborate their way to success.


.avif)


.avif)


.avif)