


Great sound is the “secret sauce” that makes for a great final video project. Whether you’re filming a corporate interview or a feature film, you want to ensure that the audience doesn’t miss a word. To get great sound, ideally you have access to high-quality microphones and recording devices that can capture crisp, clean dialogue.
Then you get into the edit room, and you’re suddenly faced with separate video and audio files that you now have to get perfectly synced, or else risk your dramatic dialogue scene looking like a foreign language dub.
Thankfully, if you’re using Adobe Premiere Pro, there are several easy ways to sync your audio and video media files seamlessly, so you can spend less time reading lips and more time editing your final product.
Why Is My Video Out of Sync with My Audio?
There are several reasons you may have audio that is out of sync with your video. The first and most common reason is you recorded your audio on a separate device from your video, and with “off camera” audio, it is nearly impossible to get the files perfectly in sync on location.
This is the reason for the “clap” function on a scene slate, it allows for a sharp, distinct sound paired with a visual cue that is recorded on all devices simultaneously, and was absolutely necessary to sync sound with video in the days of film-based shooting.
Now, thanks to technology, even if you didn’t properly “slate” your shots, you can still seamlessly sync your audio and video tracks with the help of some intelligent tools.
Your audio track may have also “slipped,” an issue more common to the digital age, where some sort of delay may have occurred during filming that caused the audio track to fall out of step with the footage. This can also be corrected during editing.
How to Sync Audio and Video in Premiere Pro
Adobe has listened carefully to the challenges of video editors when it comes to the often time-consuming process of sound syncing and has “baked in” some incredibly time saving tools into the latest versions of Premiere Pro.
Check out these three different techniques for syncing audio and video in Premiere Pro:
Method #1: Sync audio and video using the Merge Clips feature
The Merge Clips feature is one of the fastest and easiest ways to sync footage with on-camera audio to an off-camera audio track. This is a great technique to use if the project was recorded on a DSLR with an internal microphone and you want to replace the camera audio with the high-quality boom microphone you recorded on simultaneously.
Step 1: Select both tracks in the project folder, right click, and select “Merge Clips”
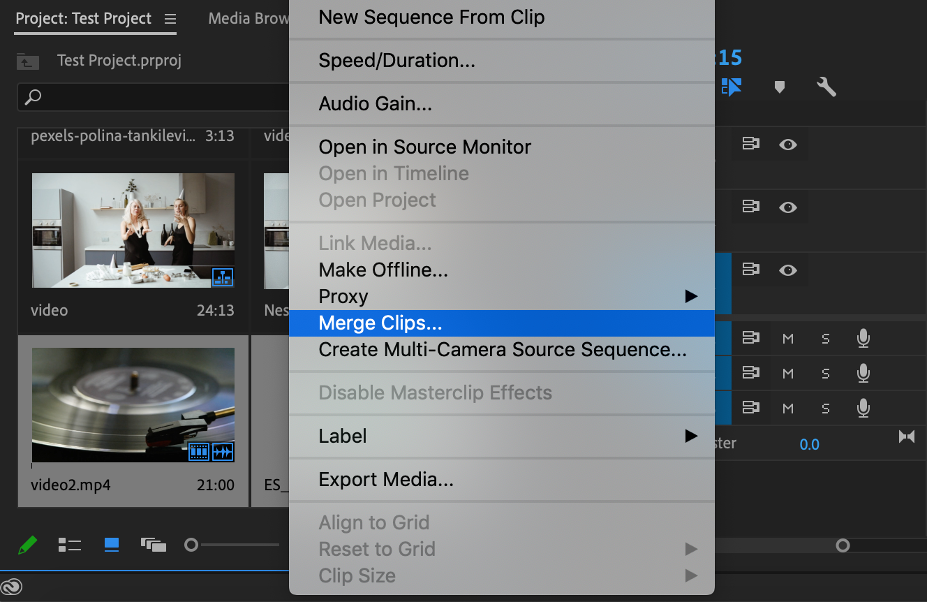
Step 2: Set the synchronization point as “Audio” and check the box that says “Remove Audio from AV Clip”

This uses your on-camera audio as the “reference” audio and lines up your external audio source with the internal audio source, then removes the on-camera audio, leaving you with your original video clip synced to your higher quality audio clip.
Step 3: Add your merged clip to your sequence
You will now have a synced audio track paired to your video track which you can now edit as a regular clip.
Create together remotely, in real time
Method #2: Sync audio and video using the “Synchronize” feature
This is another automated process that works similarly to the merge clips feature, but it does not create a new merged file. Instead, it uses artificial intelligence to sync a separate audio file to an AV file that is on your timeline without merging the two files.
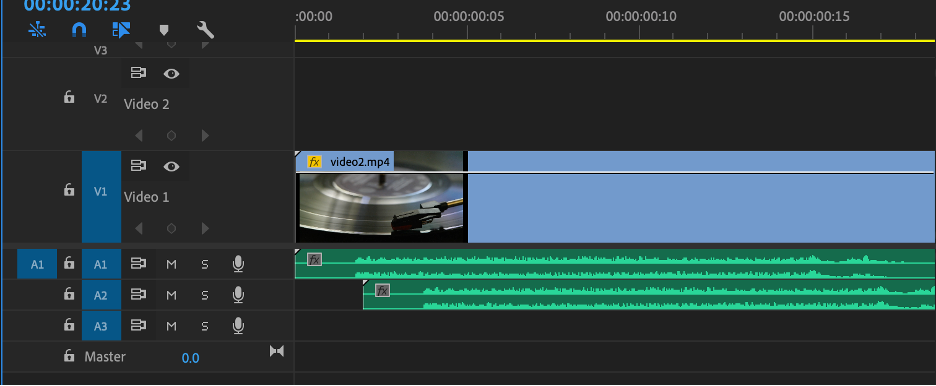
Step 1: Add the audio and video files to the timeline, stacked on top of each other
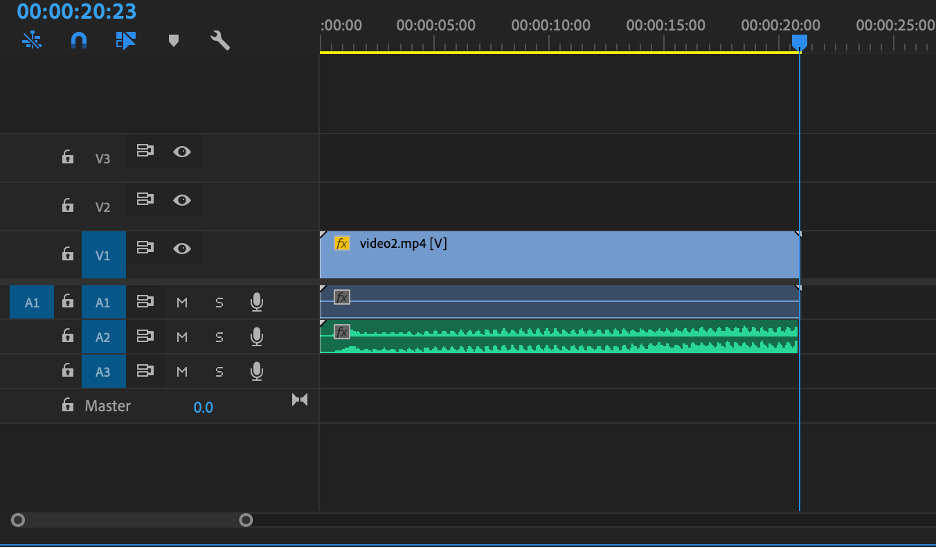
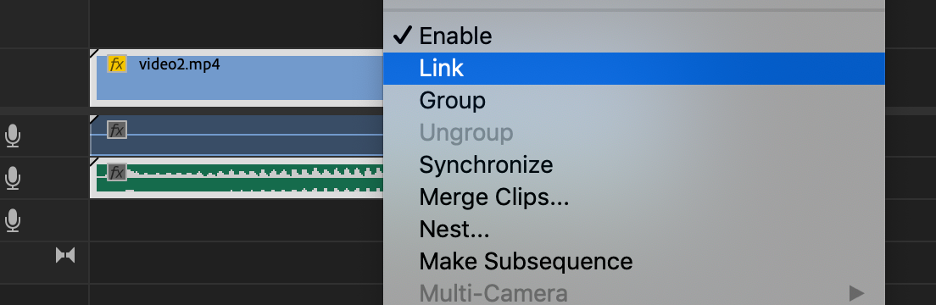
Step 2: Highlight the tracks you want to sync, right click, and select “Synchronize”

Step 3: Select “Audio” as your synchronization point and choose which track you want to sync with

You’ll want to make sure you choose whichever audio track corresponds to your in-camera audio as your track channel, this will be your “reference” audio.
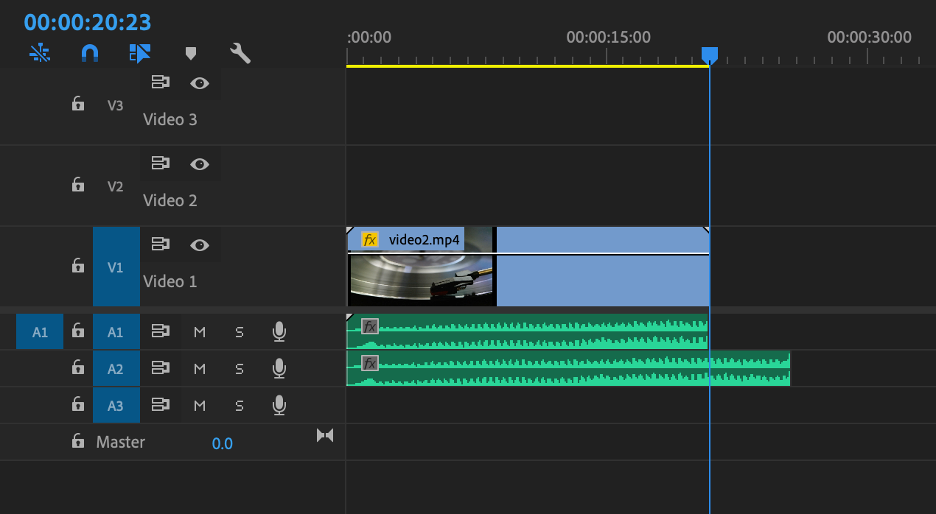
Step 4: Hit “OK” and your tracks will now be synced!
You can now also choose to “link” your synced tracks together so they don’t fall out of sync. This step is highly recommended to avoid accidental audio slips.
Method #3: Sync your audio and video using manual synchronization
As fantastic as automated technology is, sometimes it still falls short. Premiere may not be able to locate a proper reference point in your reference audio, or perhaps you don’t have reference audio to sync with. If this is the case, you may have to manually sync your audio and video tracks together.
Here is how to sync audio and video manually with a reference track:
Step 1: Place both the audio and video tracks on your timeline
Step 2: Zoom in and find a good, clear reference point that matches in both audios
Step 3: Mark each clip at the point where you see the exact same wavelength
You can do this by pressing “M” on your keyboard with the clip selected
Step 4: Align the clips at the markers

Step 5: Link the clips and delete the reference track (if needed)
No matter what your situation, Adobe Premiere Pro makes syncing audio and video relatively simple and straightforward.
Here is how to sync audio and video manually without a reference track:
This process is far less straightforward as syncing with a reference track, and works best if you properly “slated” your shot.
First, locate the slate on your video track. Watch frame by frame until you see the moment that the clapper stick hits the top of the slate board, and mark that frame. Then, zoom in on your audio clip and look for a large sound spike at the beginning of your audio track. Listen to it and confirm that it is the sound of the “clap” the slate makes as the clapper stick comes down. Mark the highest point of the clap sound in the waveform, and match that marker with the video marker you made earlier, then watch the clips together with the sound on.
If you properly marked both of these, your audio and video should be in sync. They may be a tiny bit off, and if this is the case, slowly move the audio forwards or backwards by small increments until everything is in sync, then link the clips.
How to Sync Multiple Audio Tracks in Premiere Pro
To sync multiple audio tracks in Premiere Pro, simply repeat the steps above, but add all additional audio tracks before you decide to Merge or Synchronize the clips. Make sure to choose which audio track will be your “reference” track, note which track number it sits on, and sync all the tracks to that reference track.
Syncing audio and video is simple with Adobe Premiere Pro
No matter what method you may be using, Adobe Premiere Pro gives you all the tools to make sure your audio and video match up perfectly. It’s automated features save tons of time, and even if you can’t take advantage of these, using the powerful visual tools at hand can make syncing up audio tracks as painless as possible.
Good luck and happy syncing!


.avif)


.avif)


.avif)