


When you’re editing and color-correcting your latest video project, many editors find themselves “eyeballing” the process, only to discover that once they export their final product, the colors and contrast dramatically shift when viewed on a different device.
This is often due to improperly calibrated monitors, but even with a well-calibrated monitor, your eyes can still deceive you. That’s because our eyes are incredibly good at adapting to different lighting conditions, but this built-in talent can work against us when we’re staring at the same shot for hours on end as we attempt to strike the right color balance.
That’s where video scopes come in. These tools won’t lie to you like your eyes and monitors might. They provide exact representations of what elements make up your image, from color values to lightness, and are your best friend when perfecting everything from skin tones to overall image color.
Here are the most common scopes used in both production and post-production:
Production Scopes
Histogram

A histogram allows you to see the tonal values of your clip. This is a representation of the highlights, midtones, and shadows (also called blacks or shade) of your image.
For an 8-bit image (which is standard), pure black has a value of 0 and pure white has a value of 255. Visually, in this example, the darks are at the bottom of the graph and the whites are at the top. This graph shows the distribution of colored pixels within each value of lightness or darkness. As you can see, there are peaks at the bottom and top of the graph, representing that there are some parts of the image that are very light or very dark, but overall most colors fall within the midtones.
This graph only tells you how light or dark the RGB elements of your image are, not about saturation, tone or other color elements of the image.
It is most useful for preventing “peaking,” which is when certain parts of an image are too light or too dark, making details imperceivable.
While we’ve listed this as a production scope, it is also very commonly used in post-production to correct overexposure or “crush” blacks to make them richer and darker.
Zebras
This scope is commonly used during shooting to allow cinematographers and videographers to note which areas of an image fall into a certain luminance range. Zebras can be set to overlay the image wherever the image falls into a certain value of lightness.
This is commonly used to see which parts of an image are either totally white or totally black, or to see where the image is approaching those values, such as 80-90% white.
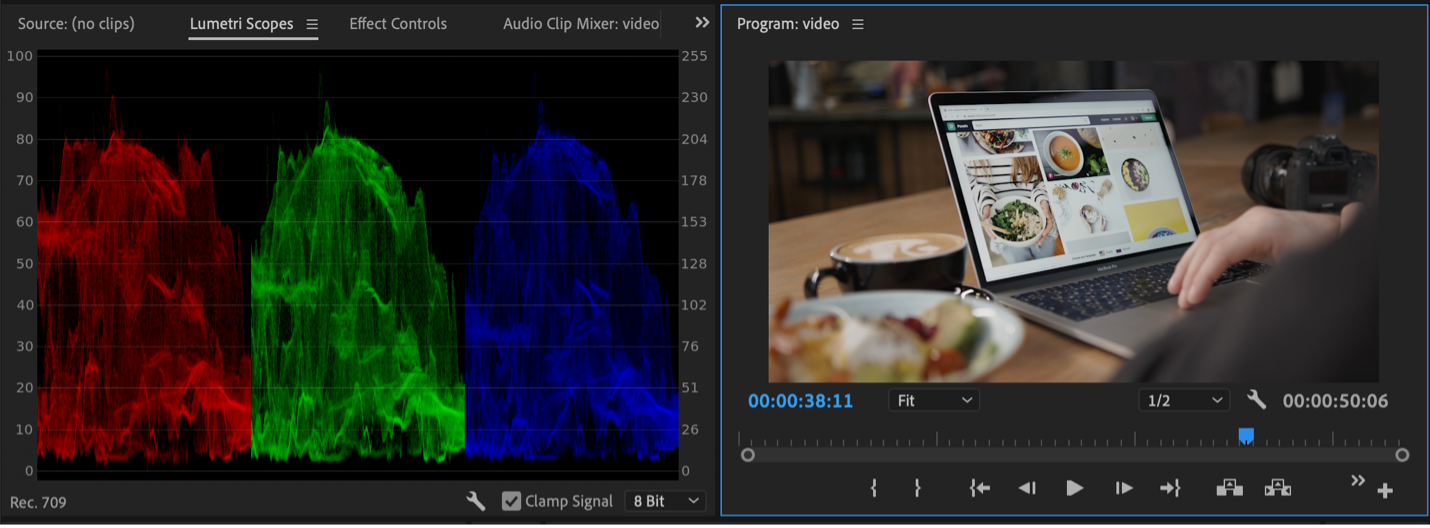
Waveform RGB
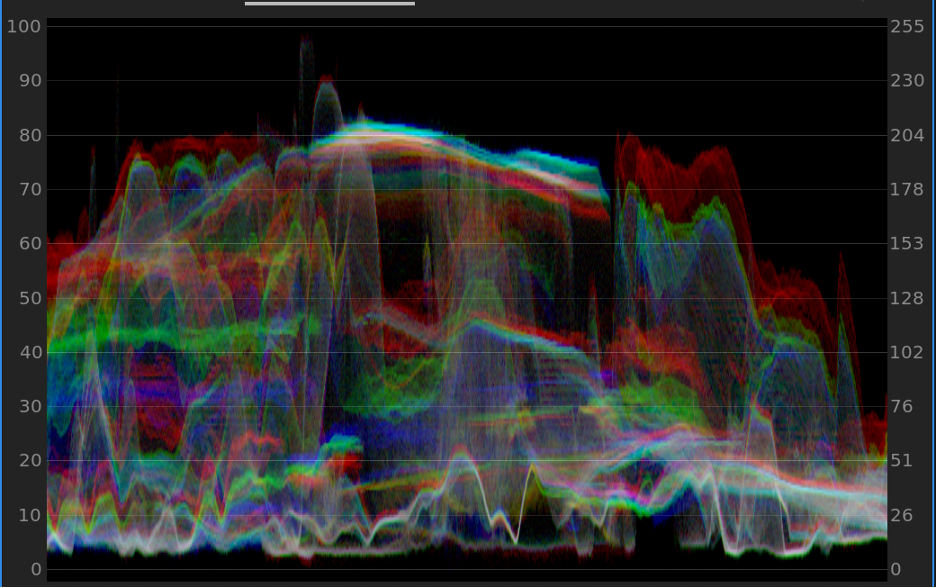
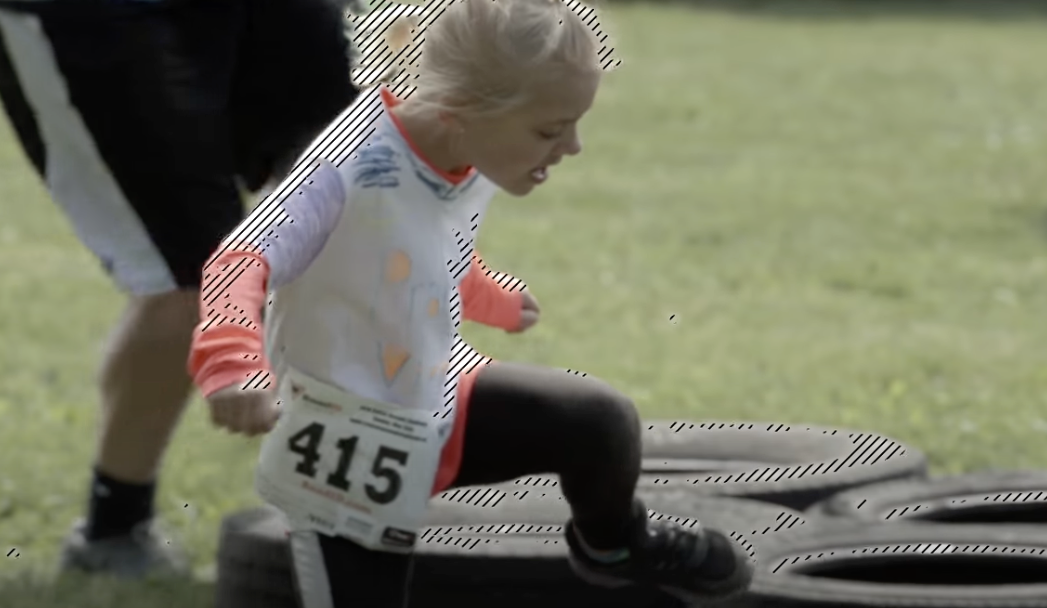
One of the most common but most intimidating-looking scopes is the waveform. This is another way of reading color luminance, but unlike the histogram, it breaks up the color spectrum into red, green, and blue and creates a “reflection” of what colors are lighter or darker in each section of the image.
For example, if you look at this waveform next to the original source clip, you can see that the brightest luminance is in the middle of the screen, but the shot is overall pretty evenly lit, with the darkest area to the right of the shot where we have a dark grey shoulder of a person in the corner of the frame.

In this example, you can see there are less prominent reds in this clip, and overall the image is darker except for selective spots of highlights.
Waveforms can be used in both production and post production to see just how light or dark your image is and if there are any areas of your frame that are “clipping” or hitting maximum lightness or darkness.
False Color
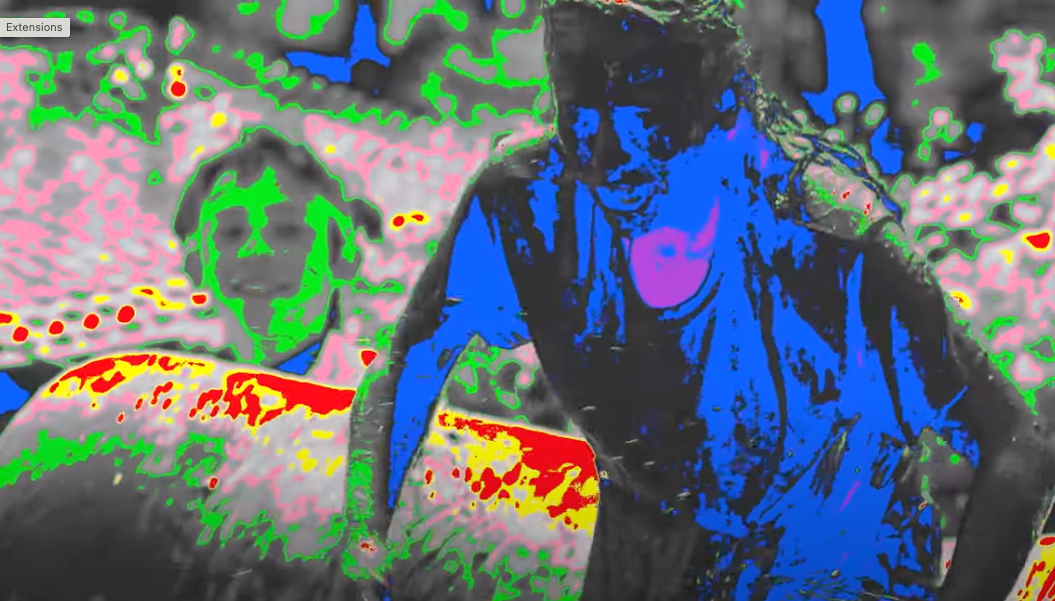
False color is a favorite scope for cinematographers, because it allows them to assign different colors to different exposure ranges in an image. This gives them a clear picture of exactly what elements of the image fall into the highlight, midtone, and shadow ranges.
In general, overexposed areas will be colored red, while underexposed areas will be colored blue. This vibrant overlay takes the guesswork out of seeing exactly how each individual element of your image is exposing.
While this is most commonly used by cinematographers and videographers, editors can use this overlay as well to double-check their exposures quickly and easily.
Create together remotely, in real time
Post-Production Scopes
RGB Parade

The RGB Parade is a popular post-production scope that measures the saturation of each color of red, green, and blue across an image. You can see which colors are more saturated than others in different areas of an image.
The RGB Parade lets you easily control the saturation level of the colors in your image. For a well-balanced image, you want to keep each color within the upper and lower limits of the scope to ensure colors are not over or under-saturated.
Just like luminance, color saturation can “peak” to the point where colors become oversaturated and distorted or under-saturated and lose color entirely. You can also use the RGB Parade to help you mix creative color casts over your images to stroke certain moods.
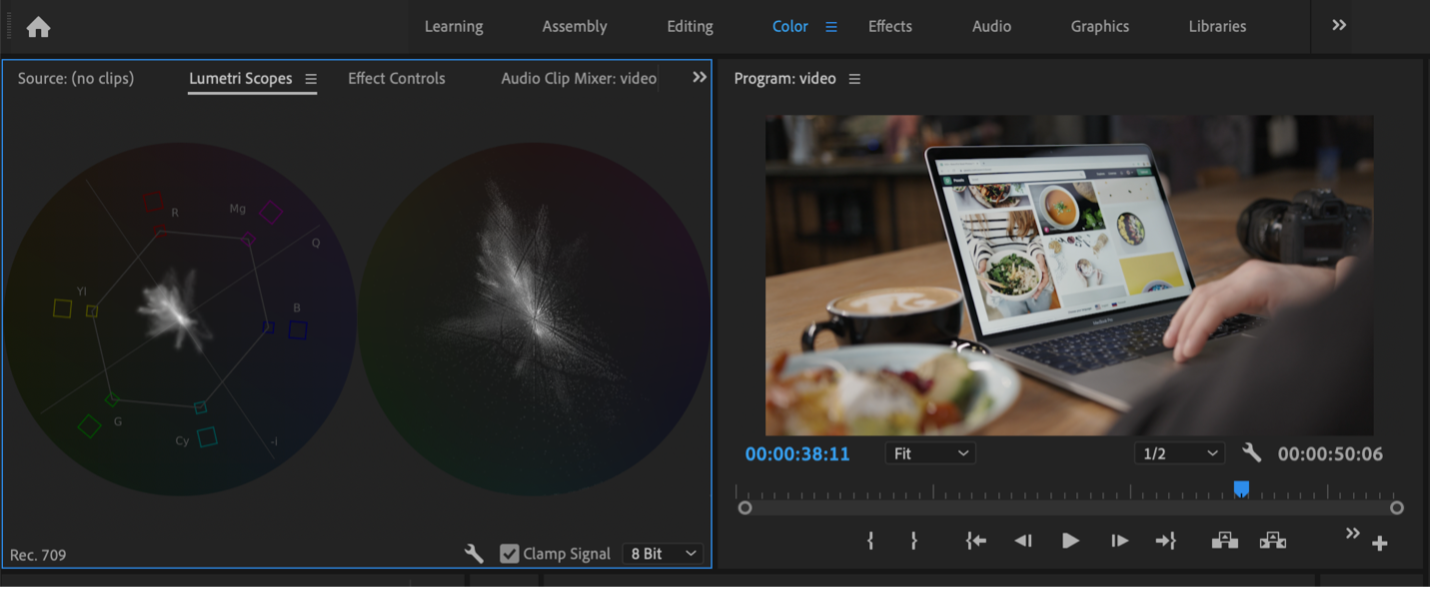
Vectorscope

Vectorscopes are another handy visual post-production scope. You have two options with the vectorscope, the HLS vectorscope and the YUV vectorscope.
The YUV vectorscope displays the hue and saturation of the colors in the image on the circular graph. The colors it displays are red, magenta, blue, cyan green, and yellow. The further away from the center each color is, the more saturated it is. The location of each color on the graph indicates its specific hue and which hues are the most saturated in the image.
The HLS vectorscope shows hue and saturation like the YUV vectorscope, but this gives a more detailed picture of exactly how many pixels fall into each area of the scope.
How to Know Which Scope to Use?
Which scopes you do and do not decide to use is a personal choice. Ultimately, you want to use the tools that you understand the most. The best way to find out which tools work best for you is to play and experiment with each scope as you edit and manipulate your footage.
Thankfully, programs like Adobe Premiere Pro already have built-in scopes that you can experiment with and use for your color grades. And if you want to upgrade your color correction game, investing in a dedicated color grading program like Davinci Resolve will give you enhanced color editing tools as well as a full range of video scopes to ensure you deliver consistent quality every time.
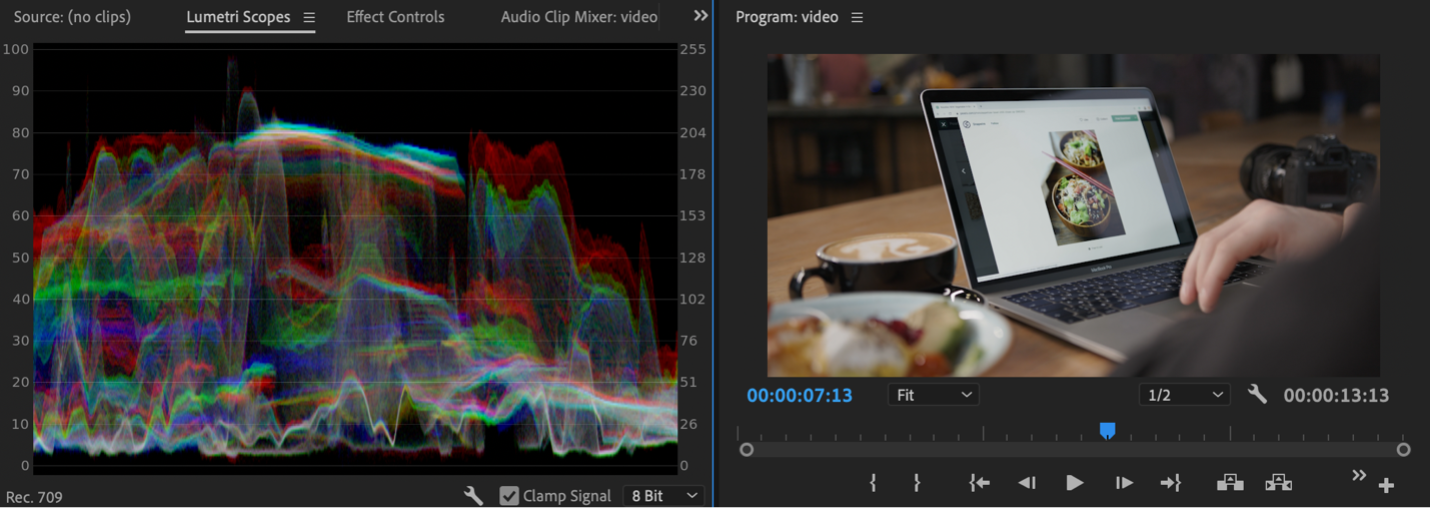
Where to Find scopes in Adobe Premiere Pro
If you’re experimenting with color in Premiere, all you need to do is go to your “Color” workspace, then select “Lumetri Scopes” in your editing window.
To change between different types of scopes, select the wrench icon in the bottom right hand panel of your Lumetri Scopes window and choose your scope from the drop down menu that appears.
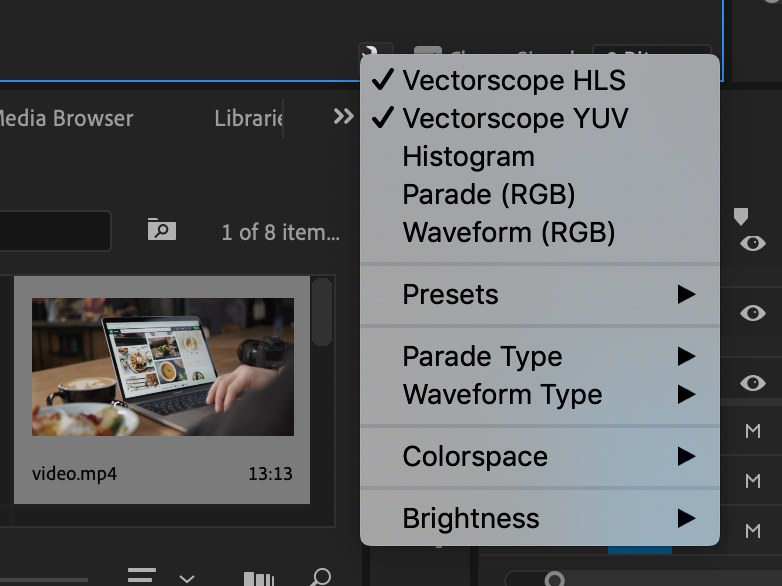
As you can see, you can also customize your parade and waveform to show different elements of your image.
Color is a crucial part of any project, it sets the mood and tells an emotional story. By mastering your use of video scopes, you can perfect how you render color and never have to “eyeball” it again.


.avif)


.avif)


.avif)