


When you’re building complex video projects in After Effects, one thing you will often find yourself in need of is the ability to export certain video elements with a transparent background.
Why is this? Well, to put it simply, a motion graphic with a transparent background can easily be layered on top of other video elements and blended into the overall environment. This is extremely handy for things like graphic logos or individual visual effects elements like fire or rain. You can create each element separately, export them with a transparent background, and layer them into your final project.
We’ve put together a quick and simple guide so you can learn how to export video with a transparent background in Adobe After Effects.
What Does a Video with a Transparent Background Look Like?
Traditionally, video elements, even with only one object inside the frame, display as a full-frame video element, meaning every part of the video frame has a colored pixel.
With a transparent video background, only the object of focus has colored pixels, the rest of the pixels are colorless or transparent. This allows only the object of focus to be visible when layered on top of other videos.
Here, we can see an object with a transparent background alone on the composition viewer:
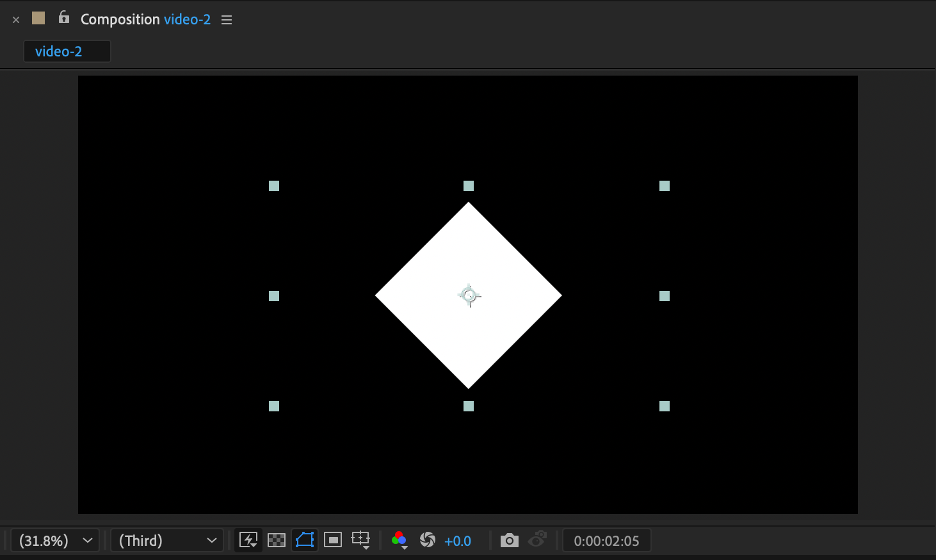
As you can see, the 8 squares around the diamond mark out the edges of this video clip’s frame. However, this object has a transparent background, which means all of the pixels except the ones inside of the diamond are transparent. It’s hard to tell that, however, when it’s not resting on top of anything, as the default composition window shows us a black background before we start putting things in it.
Now here is that same object layered over another video:
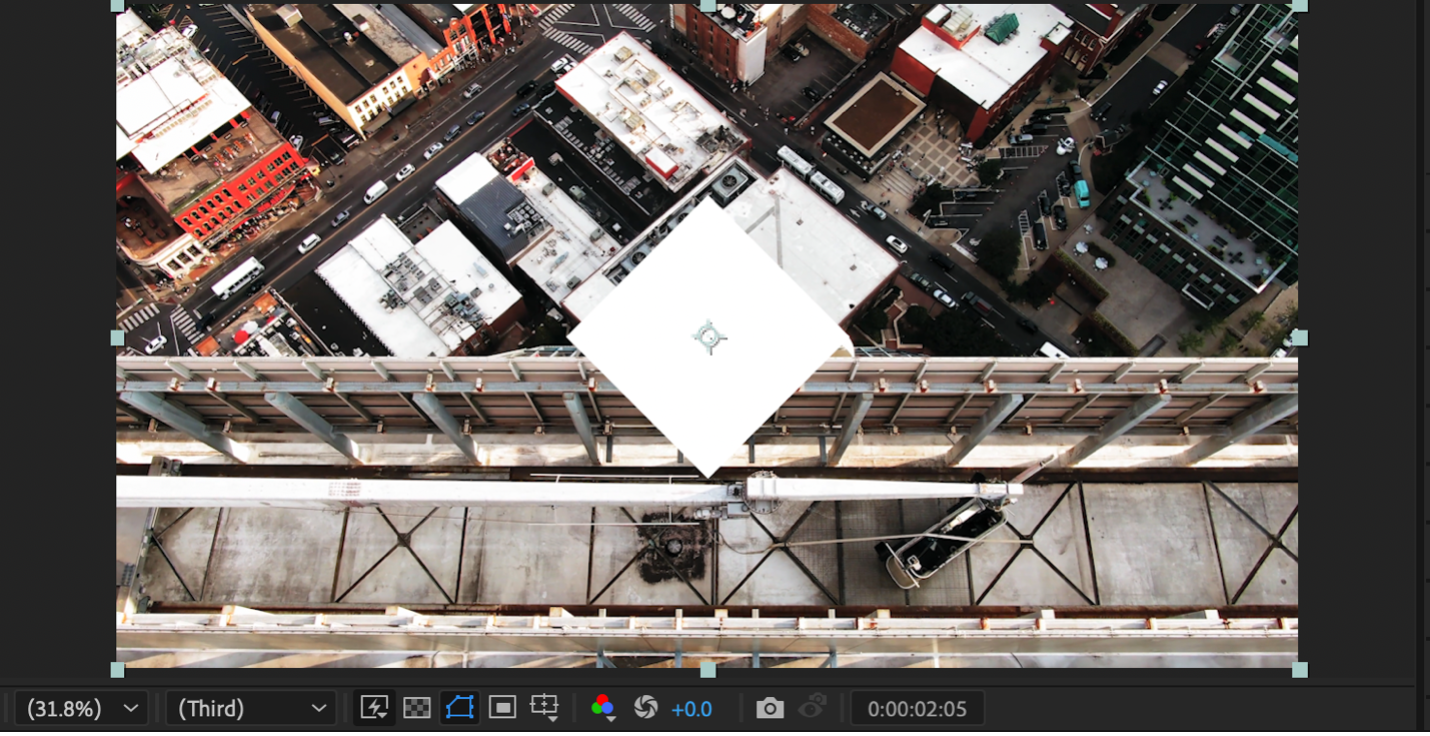
As you can see, we only see the object with nothing around it sitting on top of the other video. The object also has a square frame, but all of the pixels besides the ones inside the diamond are transparent.
You can also see whether or not your video has a transparent background using the “toggle transparency grid” button at the bottom of your composition viewer, which looks like this:

This will give you a transparency grid background instead of the standard black, which would show us our diamond looking like this:

Anywhere you can see the checkered background is a transparent pixel.
So, now that we know what a video with a transparent background looks like, let’s create one.
How to Export with a Transparent Background in After Effects
Follow these simple steps to export a video with a transparent background in After Effects:
Step 1: Select the composition you want to export, either in the timeline or project panel.
Step 2: Click the “Composition” menu and select “Add to Render Queue”
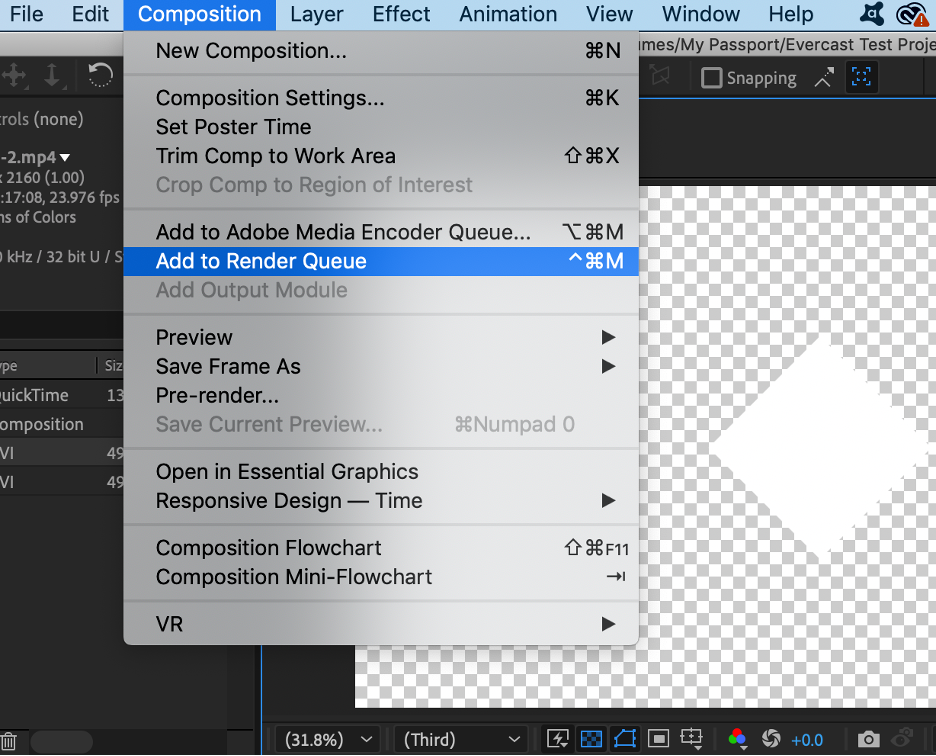
(This can also be done with the following shortcut: Ctrl=M)
Create together remotely, in real time
Step 3: Select the dropdown icon next to “Output Module” to access your video output settings
Step 4: Choose your output format (for ours, we’re using Quicktime from the format options so it will be a .mov file)
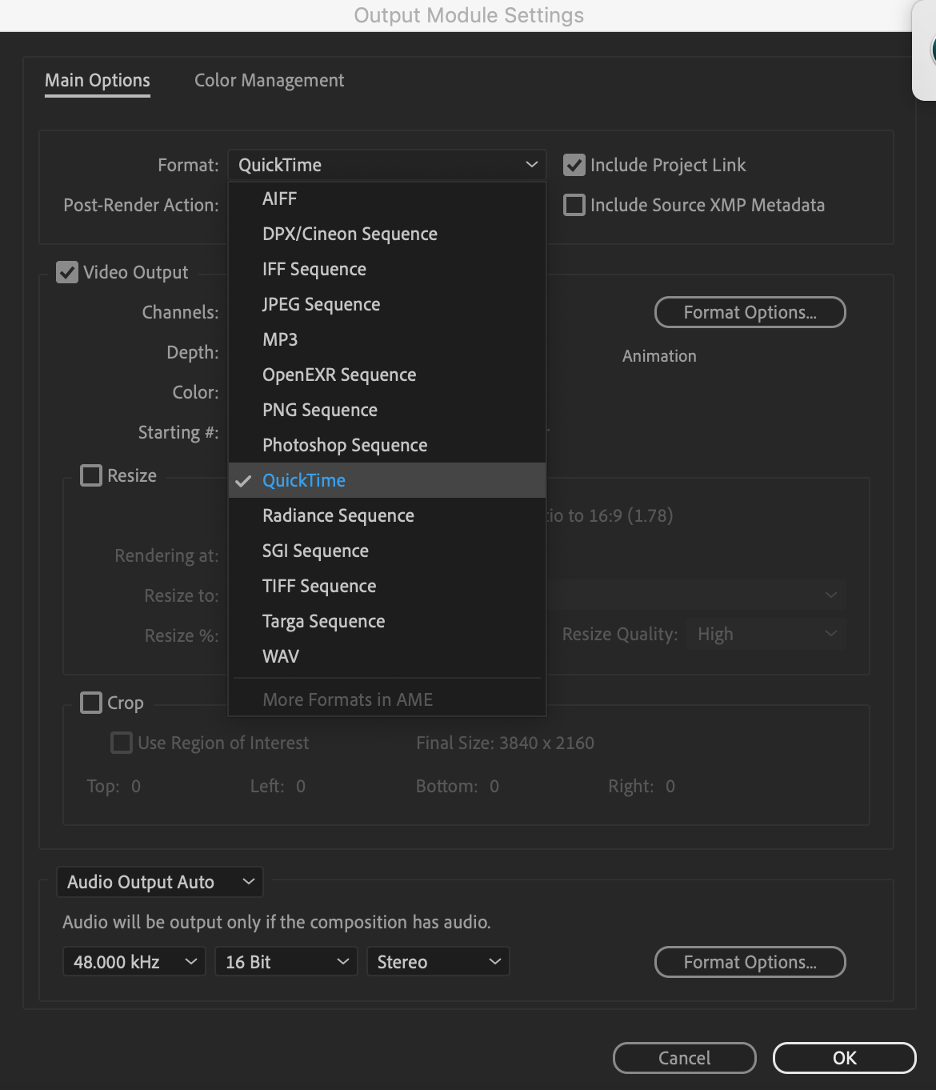
Step 5: Choose your Output Channels and select “RGB+Alpha”

Step 6: Click OK and render your final video
This will allow you to export a video that preserves your transparent pixels, allowing you to seamlessly composite elements to your heart’s content.
How to Remove Background Color in After Effects
Now, say you have a video with a colored background, and you want to remove that color and make it transparent. This commonly applies to “greenscreen” videos, but can be used with other colored backgrounds as well
Here’s how you can remove background color in After Effects, leaving you with a clean transparent background:
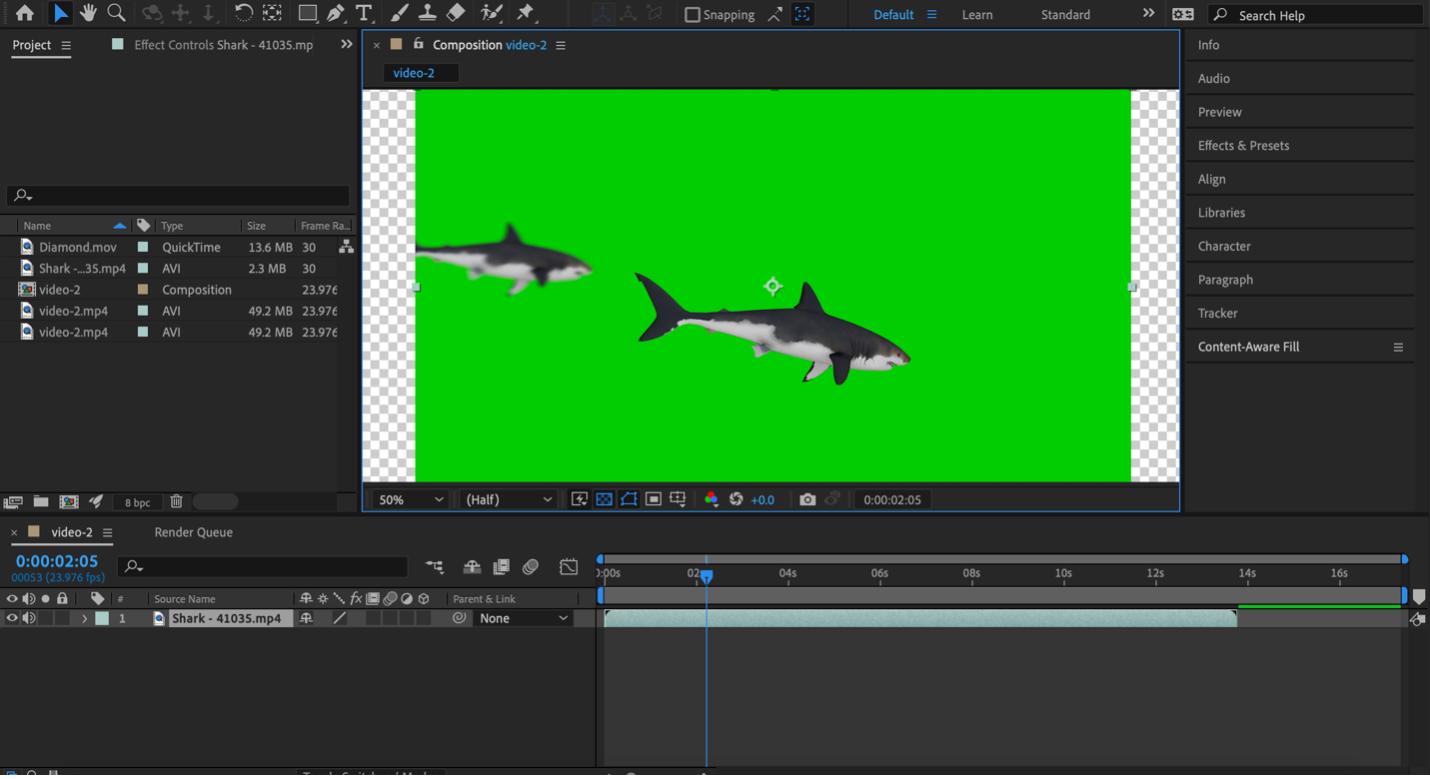
Step 1: Import your footage into the composition
In this example, we’re using daddy and mommy shark here.
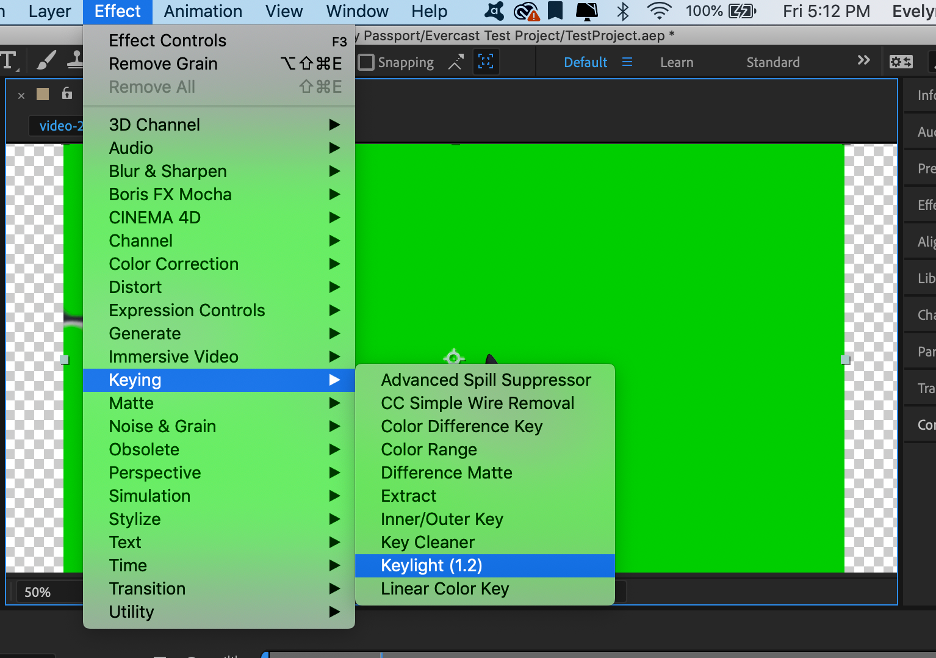
Step 2: Select “Effects” then choose “Keying” and select “Keylight”
Step 3: In the effects window, select the eyedropper tool next to “Screen Color”

Step 4: Use the eyedropper to select the background color you want to remove
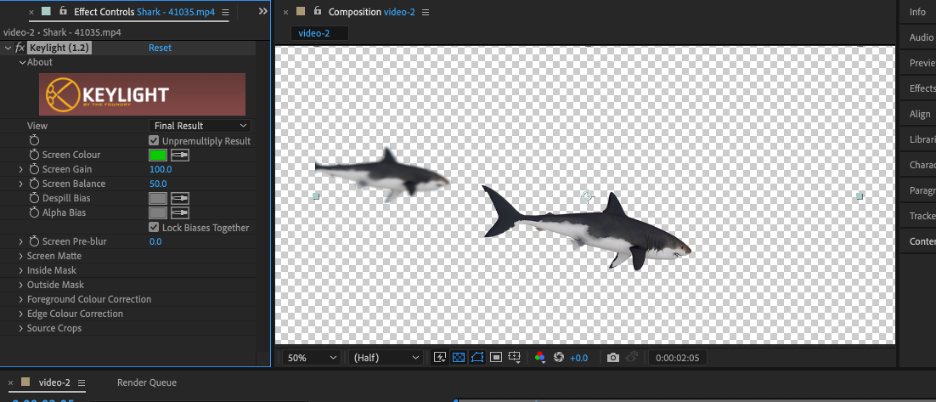
As you can see, our screen color is now the same shade of green that the background used to be, and our background is now transparent.
If your background isn’t a perfectly solid color, you can also use this tool to adjust the settings so that each shade of the background is eliminated, however, it works best with a clean, even background.
Now you know how to create and export videos with transparent backgrounds, which is a key step in creating amazing composited videos that wow your audience.
If you’re looking for a better way to bring your remote editing team closer together and collaborate more efficiently from a distance, check out Evercast. Evercast allows you to stream your edit sessions in HD while video chatting and exchanging notes with your team, all under one platform. Because we believe collaboration is the magic behind the movies. Learn more about plans and pricing.


.avif)


.avif)


.avif)