


Reversing a clip is a fun effect that is most often used in things like sports footage to add visual interest. It's often used to mimic the effect of "rewinding" a videotape so you can playback the footage one more time. You can combine this effect with
If you like working with action or sports footage, knowing how to reverse and speed up a clip for the rewind effect is a key tool to have in your pocket.
We’ve compiled a quick tutorial on how to reverse or speed up a clip in Adobe Premiere Pro. Make sure to bookmark this so you can quickly reference it during your next project editing session.
Step-by-Step Tutorial of Reversing a Clip in Premiere Pro
Follow these simple steps to reverse your clip in Premiere Pro.
Step 1: Locate the video file you want to reverse on the timeline or drag it onto the timeline.
Step 2: Go to "Clip," then click "Speed/Duration"
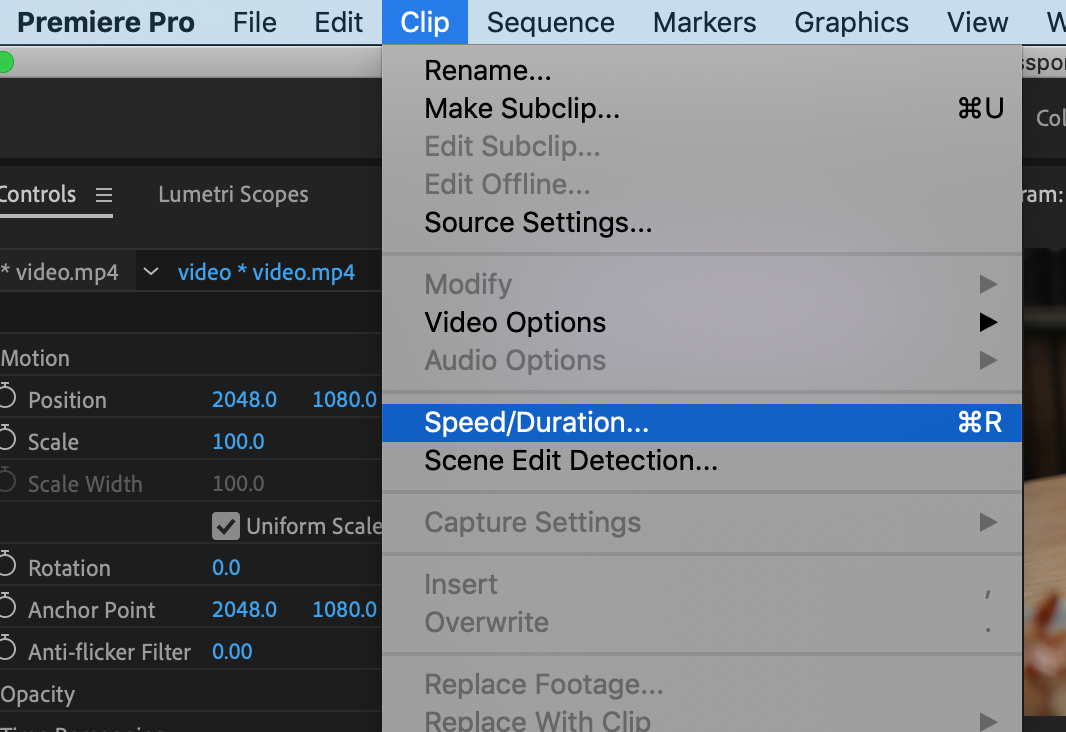
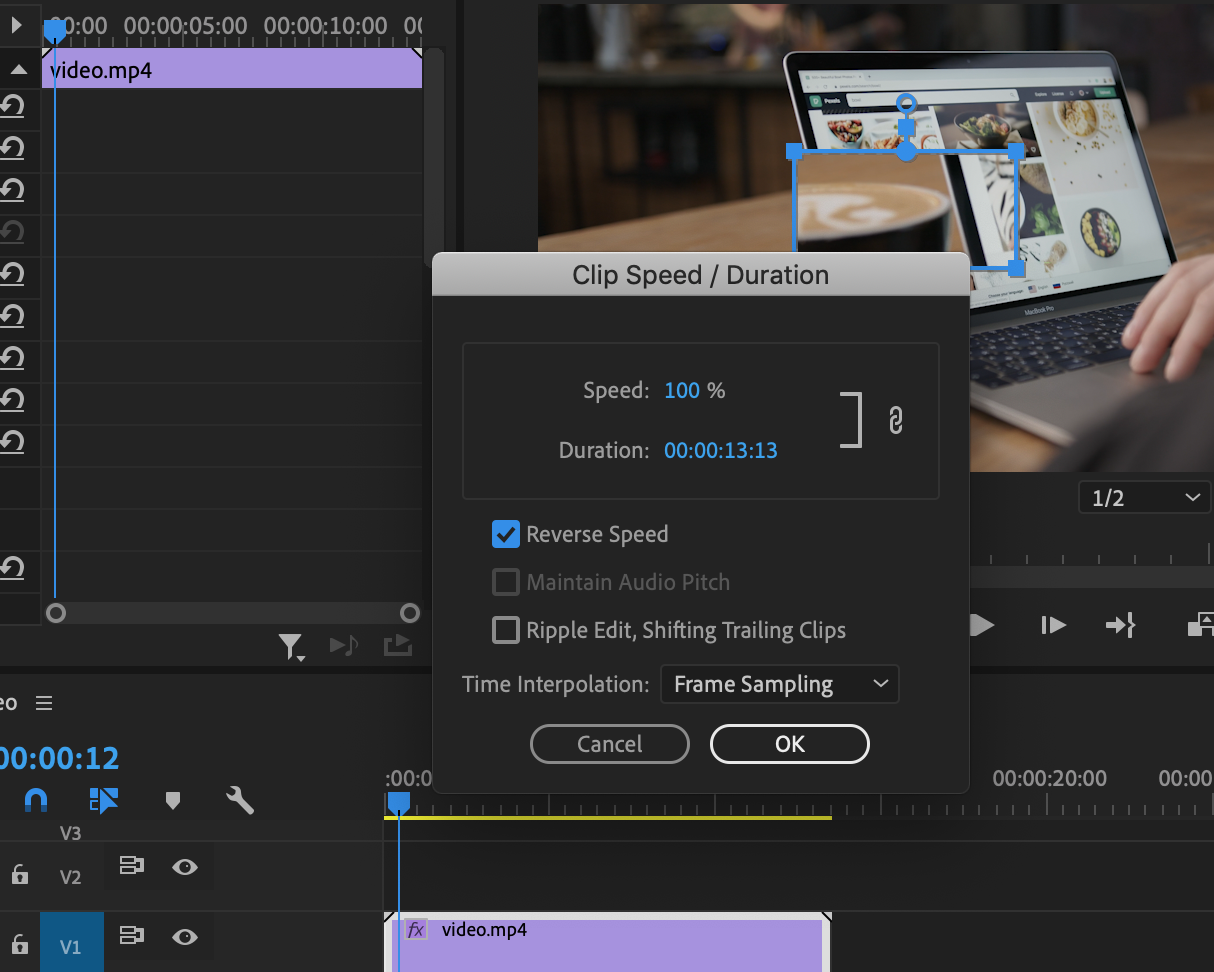
Step 3: In the box that appears, check the “Reverse Speed” checkbox
Voila! Your video will now play in reverse (backward) at the original speed.
How to Speed Up a Clip in Premiere Pro
There are many scenarios where you may want to speed up your clip in Premiere Pro. Most commonly, it’s used to create extra energy in a scene or mimic that “fast-forward” effect of VHS tapes. It can also be used to “ramp up” exciting car chase scenes or other stunts.
Follow these steps to speed up a clip in Premiere Pro:
Step 1: Locate the clip you want to speed up on the timeline or drag it onto the timeline.
Create together remotely, in real time
Step 2: Go to "Clip," then select "Speed/Duration"
Step 3: In the “Speed” box, type in any number above 100% to speed up the clip by that amount.
If you want your clip to play twice as fast, enter 200% into the value box. For three times as fast, 300%, and so on.
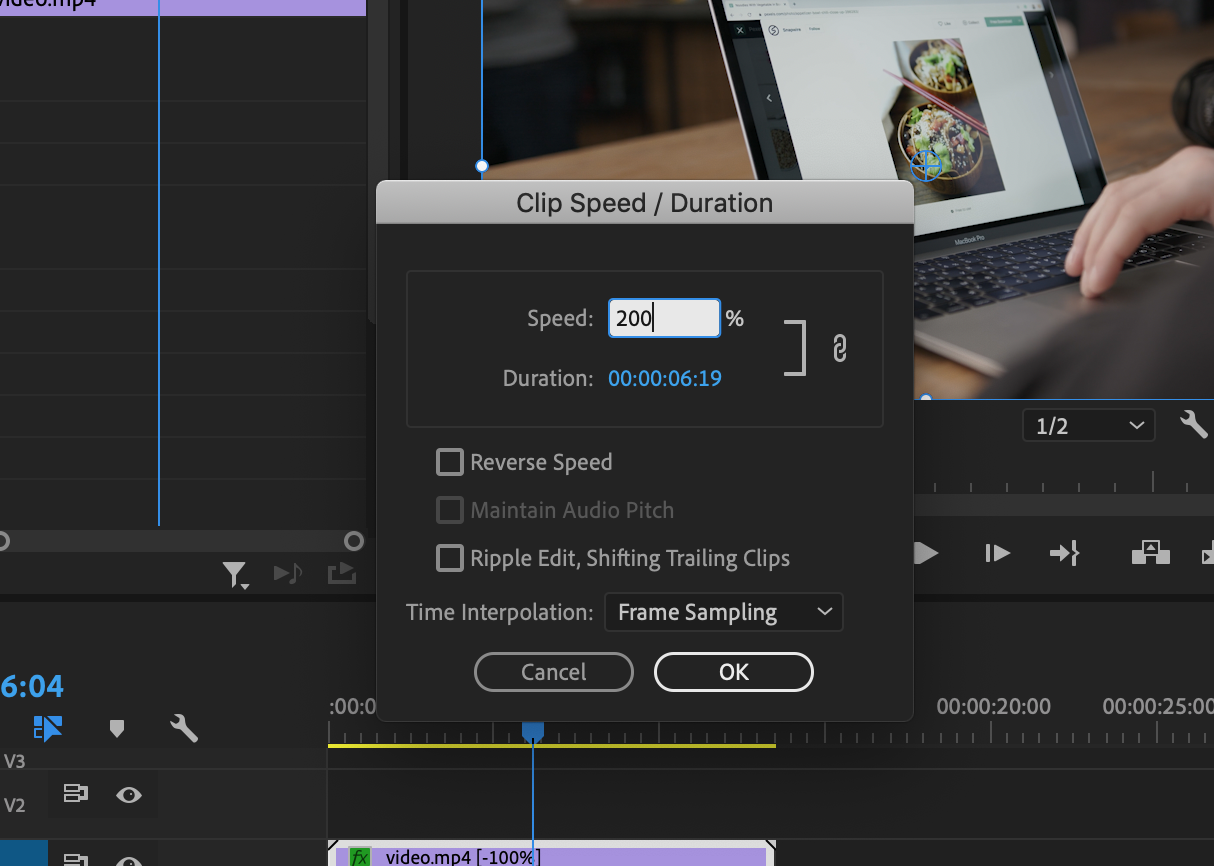
Once you hit enter, the new duration of your clip will appear below. Hit "OK," and you'll be able to preview your new sped-up clip in the clip viewer.
How to Combine Both Reverse and Speed-up Effects
Say you want to mimic the effect of rewinding a videotape, you'll want to combine both the reverse and speed-up effects on one clip. Here's how you do it after you upload video clips to your timeline:
Step 1: Locate the clip you want to edit on the timeline.
Step 2: Go to "Clip," then select "Speed/Duration"
Step 3: Check the “Reverse Speed” checkbox.
Step 4: Type in the amount you want to speed the clip up by into the speed value box.
Step 5: Hit “OK” and preview your clip.
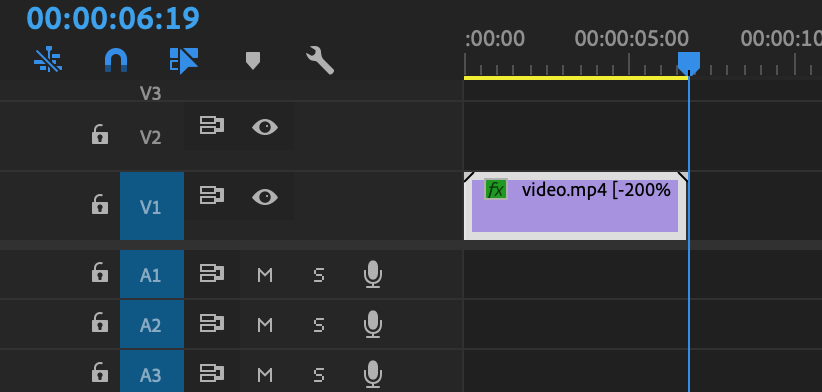
You will notice on the timeline that the clip will display a value of (- your selected speed percentage). This indicates that your clip is sped up but playing backward.
Some additional tools you can use with Speed/Duration changes:
If you’re looking to refine your video playback after changing the speed or direction of a clip, try using these additional tools to help you fine-tune your clip playback quality:
Frame Sampling: This will delete or add additional frames for a smoother playback after changing the clip speed.
Frame Blending: This will further smooth out the effect by smoothing the transition between duplicate frames added during frame sampling.
Optical Flow: This is another tool that uses frame duplication to add additional frames into an image to smooth out playback. This one is especially handy not for sped-up video but slowed-down video as the more you slow down a video, the jerkier it can look if you didn't shoot it at a high frame rate.
Using these tools, you should be able to create seamless speed changes that can be used to enhance a wide variety of video projects. Happy editing!
If you’re looking for a better way to bring your remote video editing team closer together and collaborate more efficiently from a distance, check out Evercast. Evercast allows you to stream your edit sessions in HD while video chatting and exchanging notes with your team, all under one platform. Because we believe collaboration is the magic behind the movies.


.avif)


.avif)


.avif)