


Sometimes, a little bit of shake can be lovingly called an artistic choice, but more often than not, camera shake finds its way into your footage where you don't want it to be. Whether from improper stabilization or a slightly over-enthusiastic camera operator, sometimes footage is rendered a little too jarring, and you want to smooth it out a little bit.
Thankfully, Adobe Premiere Pro has some handy tools that will help you take the shake out of your footage in post-production and give you smooth, stabilized video instead of a headache-inducing earthquake.
Why Should You Stabilize Your Video?
There are a variety of reasons you might want to stabilize your video. Most of the time, it's due to unintended shakes during camera movements such as pans and tilts. This can be caused by stabilization equipment that is improperly calibrated or cheap tripod heads.
When a camera shakes where it naturally shouldn’t, it can be extremely distracting for the viewers and take them out of the “suspension of disbelief” that you hope they enter while watching your project. It also just makes the footage look less polished, lowering your overall production quality.
How to Stabilize a Shaky Video in Premiere Pro
With Adobe Premiere Pro, you can stabilize shaky footage using their handy Warp Stabilizer tool. Here’s how:
Step 1: Select the video you want to stabilize and add it to the timeline.
Step 2: Go to your “Effects” workspace and locate the Effects folders.
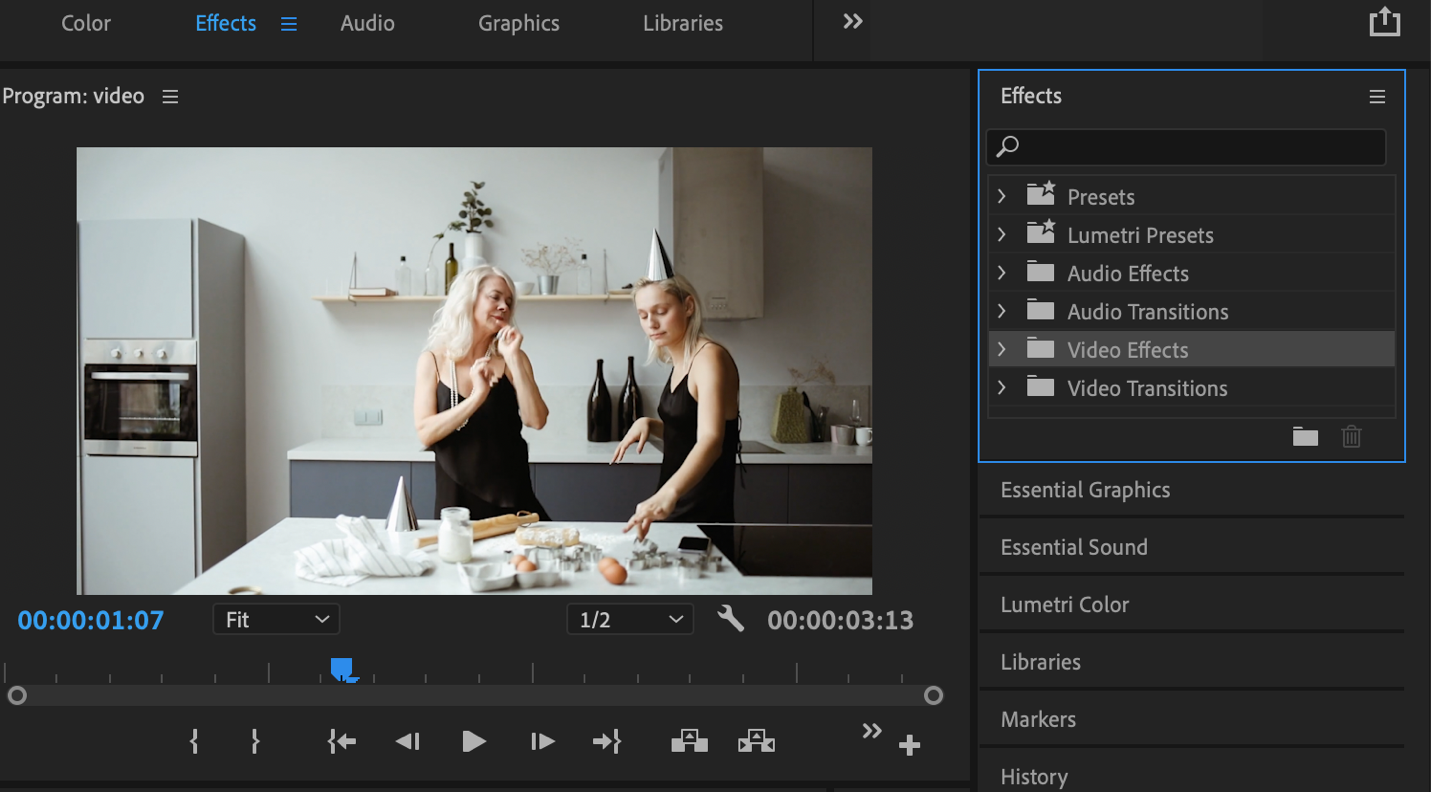
Step 3: Choose the Video Effects folder and open it.
Step 4: Scroll down to "Distort," open it, and double-click on "Warp Stabilizer"

Step 5: Premiere will now "Analyze" your footage for stabilization; this may take a minute or two.
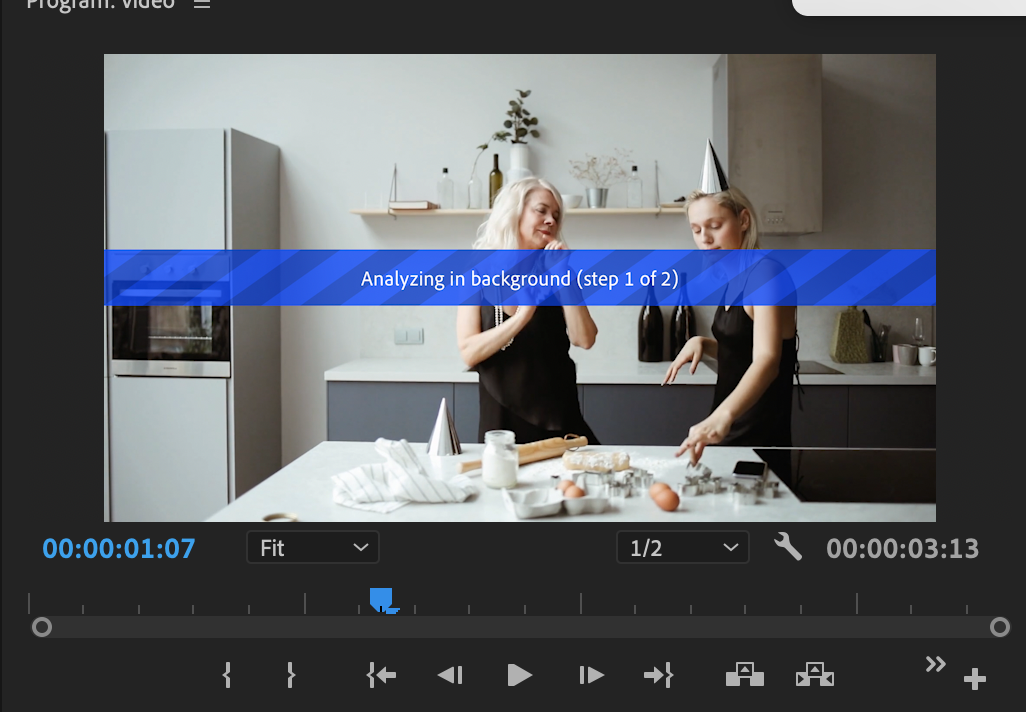
Step 6: Once the footage is analyzed, Premiere will now stabilize it using its stabilizing algorithm.
Create together remotely, in real time
Step 7: Review your footage to see how much shake Warp Stabilizer was able to remove!
Now, the results of Warp Stabilizer may vary. If the clip is too dark or there is too much shake, it may not be able to correctly render and correct the footage.
If you’re happy with the result, you’re done with stabilization. However, if things don’t look quite right, here are some steps you can take (according to Adobe):
- Look at the framing: Inspect what the Stabilizer is doing by changing the setting to Stabilize Only under the Framing menu. This displays the entire frame, including the moving edges. Stabilize Only shows how much work is being done to stabilize the image. Using Stabilize Only allows you to crop the footage using other methods. (Note: When selected, the Auto-scale section and Crop Less Smooth More property are disabled.)
- Tweak smoothing and cropping: Under Advanced Settings, reduce either the Smoothness or Crop Less Smooth More function. Crop Less Smooth More is much more responsive, as it doesn’t require a restabilize phase.
Also, Warp Stabilizer requires the program to crop in on your footage slightly, so you may notice some lost details on the edges of your frame. This is not usually a dealbreaker, but it's something to consider.
The benefits of Warp Stabilizer are:
- It’s fast.
- It’s automatic.
- It's built-in to Adobe Premiere, so there are no additional plugins or software to buy and handle.
That being said, it has its limits, so we’ve also compiled some other ways you can smooth out your videos besides Warp Stabilizer.
Other Techniques to Stabilize a Video
Since Warp Stabilizer doesn't always yield perfect results and may distort parts of your image, there are some other ways of stabilizing your shaky video footage that is worth noting.
Purchase a third-party plugin
There are many great third-party plugins that allow you more control over how and how much you stabilize your images. Consider purchasing one of these if you would like more control over stabilization while still working inside Premiere Pro.
Stabilize your footage in After Effects
After Effects also has a warp stabilizer that is sometimes slightly more accurate than the one in Premiere, but you also have the option of using keyframes and motion tracking to manually stabilize your footage in After Effects. This takes more skill, but it can provide more precise results.
Tips to Make Your Future Footage Less Shaky
The best way to eliminate shake, of course, is to have less shake in the original footage. You can save yourself a ton of time in the editing room if you invest in proper stabilization equipment and learn how to use it. Here are some examples of stabilization equipment:
- Tripods: This is the basic piece of equipment every filmmaker should have. The tripod will eliminate a handheld camera shake, and if you pair it with a high-quality fluid head, you can pan and tilt smoothly with hardly any extra shake.
- Gimbals: Slightly more advanced, gimbals use a combination of manual weight balancing and computer-controlled gyroscopes to give you buttery-smooth movement even when running or going up and down flights of stairs. They can also be relatively affordable compared to more heavy-duty stabilizers and are more lightweight.
- Steadicams: The "godfather" of camera stabilization is the Steadicam. This body-worn stabilizer requires technique and training to properly operate but will give you the smoothest shots possible no matter what size camera you may be using.
Overall, cameras have gotten lighter and more portable, which has made stabilizing them a bit trickier because it takes less force to make them shake. However, stabilizers are also a bit more affordable because they don’t all have to balance a 20-pound camera setup. The key is investing in equipment that fits your budget while saving you time in the editing room.
However, if you are working with shakier footage (because hey, most of the time, it isn't even you that shot it), hopefully, this guide will help you stabilize it in a snap so you can keep in your editing flow and produce a polished final product.
…
If you’re looking for a better way to bring your remote editing team closer together and collaborate more efficiently from a distance, check out Evercast. Evercast allows you to stream your edit sessions in HD while video chatting and exchanging notes with your team, all under one platform. Because we believe collaboration is the magic behind the movies.


.avif)


.avif)


.avif)